
How to configure proxy settings on Ghost Browser
1. Open Ghost Browser
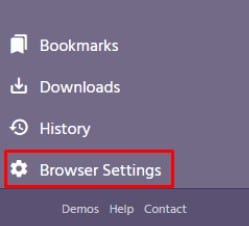
2. Click ‘Browser Settings’ in the bottom left side of the Ghost Browser.
3. Scroll to the bottom, click ‘Advanced’.
4. Scroll to the bottom again and under ‘System’ click ‘Open proxy settings’.
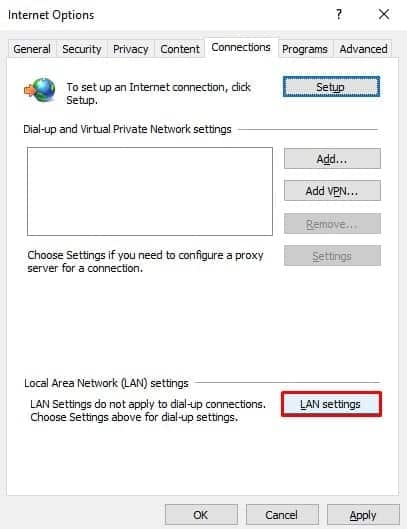
This will open up the ‘Internet Properties’ window.

5. From the “Connections” tab of the Internet Properties window, click “LAN Settings”.
6. In LAN Settings, under ‘Proxy server’ select ‘Use a proxy server for your LAN’.
7. Enter the NetNut proxy URL and port in the Address and Port fields:
• Address: gw.ntnt.io
• Port: 5959
8. Click “OK” to save your proxy settings.

9. Open a new tab in the Ghost browser.
You will be prompted to enter your username and password. Enter your NetNut username and password here and click “OK”.
Choose a country by entering the country code at the end of the username like this:
United States: username-cc-us
Germany: username-cc-de
Spain: username-cc-es
10. Check the IP using Ghost Browser

Done! You can now explore the web using NetNut proxies
directly from your Ghost Browser.