
Initial Requirements: Java runtime application installed in your local machine + signed account at Incogniton.
1- Go to https://incogniton.com/

2- Click on Download Incogniton Section
3- Choose Mac or Windows version
4- Run the exe file
5-Choose Installation Language
6- Sign In by using your selected Email + Password
7- Click on “New Profile” to set your profiles
8- Go to Proxy
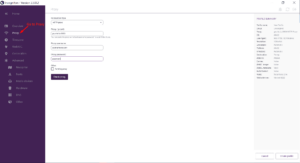
9- Select Connection Type “HTTP”
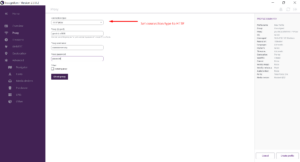
10- Input your Netnut proxy credentials.
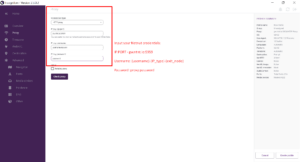
11- Click on “Create Profile”
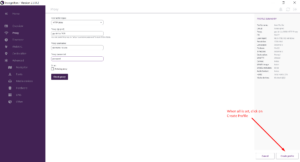
DONE! Lalicat will now run through NetNut proxies,
as easy as that!