What is Octo Browser?
Octo Browser is an antidetect browser that allows you to create and manage multiple accounts without worrying about IP bans and other limitations. It is designed to handle multi-accounting tasks for services including Facebook, Google, TikTok, Amazon, and CoinList.
Octo Browser is a reliable solution for managing affiliate marketing, e-commerce, bounty & airdrop, web scraping, bonus hunting. In addition, individuals and agencies can benefit from the features of the Octo Browser to ensure optimized anonymity.
To ensure you get the best from Octo Browser, pair it with a reliable proxy server like NetNut. Proxies provide an additional layer of security and anonymity to eliminate any incidence of IP bans.
Read on to discover how to install the Octo Browser and configure NetNut proxies on it.
Integrating NetNut Proxies on Octo Browser
Step 1: Go to Octo Browser website to download the application as well as to register

Step 2: When you click Sign Up, you will be directed to the registration page. Fill out the details.

Step 3: Once you have filled the form above, click Create account; the next step is to verify the account.

Step 4: Activate your account from the link sent to your email address

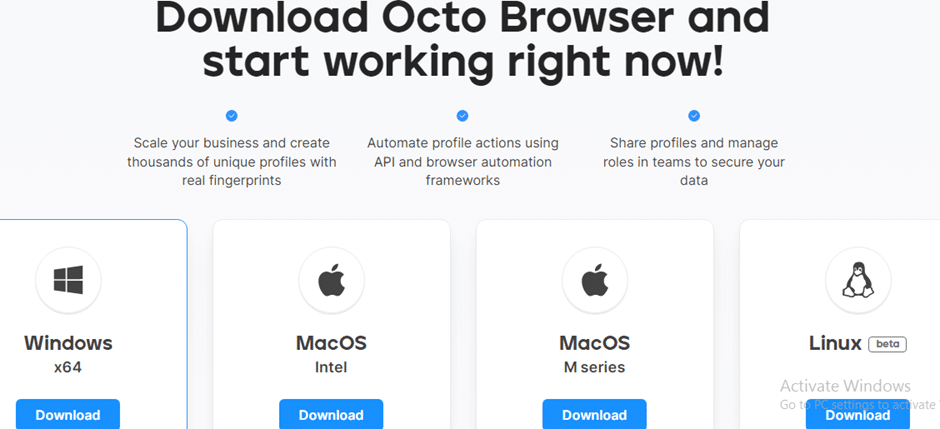
Step 5: After activating your account, it takes you to the Download page where you can select the version that corresponds with your device.
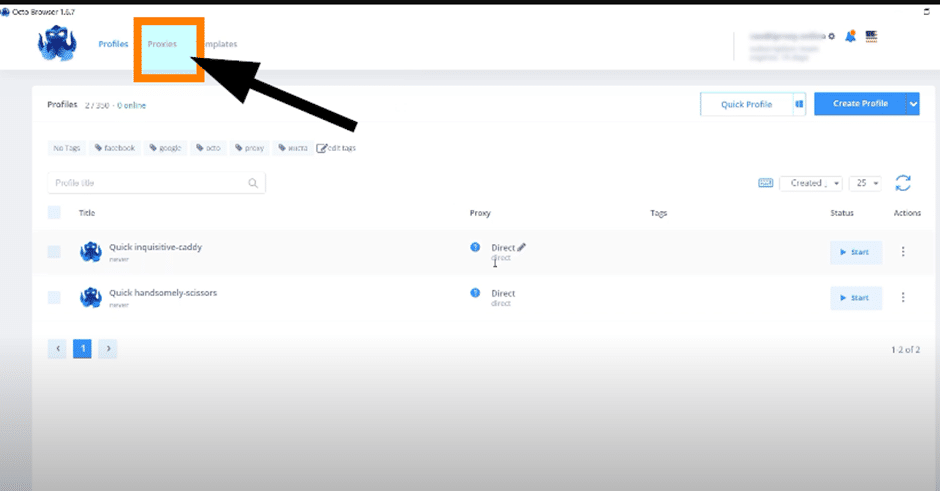
Step 6: Once the download is complete, launch the browser. Select Proxies on the main page
Step 7: Select Add Proxy to add a NetNut proxy server to Octo Browser

Step 7: The next step is to configure the proxy on Octo Browser. Select a preferred Title. Choose HTTP or SOCKS5 under Type. Login with your Username and Password, which is provided on your NetNut dashboard.

There are various proxy types so when integrating NetNut proxies, choose HTTP or SOCKS5 protocol
This is an example of a proxy string for a browser :
USERNAME-stc-uk-sid-123456789:PASSWORD@gw-am.ntnt.io:5959
-
Hostname Configuration
Copy the hostname/server address provided by NetNut
Example: Type gw-am.ntnt.io into the host field if you are using HTTP protocol. Alternatively, type gw-socks-am.ntnt.io for SOCKS5 protocol
-
Port number Configuration
The Port number for NetNut HTTP proxies is 5959 and 9595 for SOCKS5
-
Username Configuration
Username is your login, which you can find in your NetNut account in Settings -> Billing.
Proxy-type is the proxy type that you use. NetNut provides three different proxy types depending on your subscription plan. Your username should have three components including your user ID, type of proxy( residential, datacenter, static) and target country.
· dc — datacenter;
· res — rotating residential proxy;
· stc — static residential proxy.
Country is the country whose IP addresses will be used for connection. You can choose “Any,” in which case any available country will be used, or you can provide the ISO code of a specific country from the list of NetNut Available Countries: e.g., jp(Japan), fr(France).
Example: ticketing123-res-us
This is where you get the proxy username and password from the customer portal. You can also get in touch with your account manager if you’d like additional assistance.

-
Consistent IP session
While NetNut provides rotating IP addresses, you may want static IP address. This can be useful when you want to maintain your session via the same IPs. Then you need to incorporate a session id (SID) with your username.
How do you choose a SID?
- Choose a number between 4 to 8 digits
- Ensure the numbers are random and non-sequential to protect your IP address
For example: ticketing123-stc-us-SID-435765
-
Proxy password
Insert the confidential NetNut proxy password
Step 8: Once you have filled in the necessary details, select Check proxy to confirm the connection. Then select Confirm to save your settings

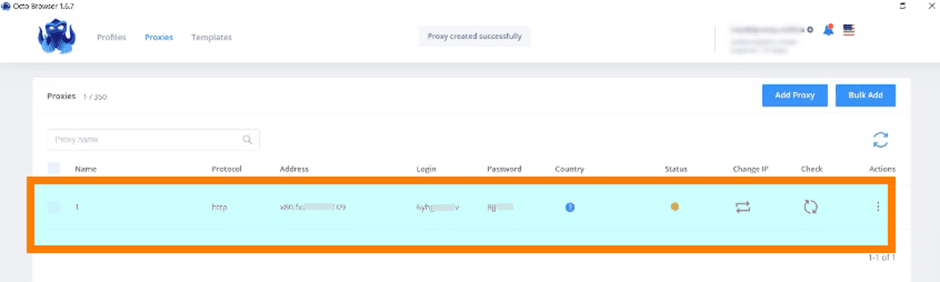
Step 9: Once your proxy has been successfully created, it will appear under the Proxies tab
Step 10: The next step is to link the proxy to a profile. Click the Profiles tab and select Create Profile.

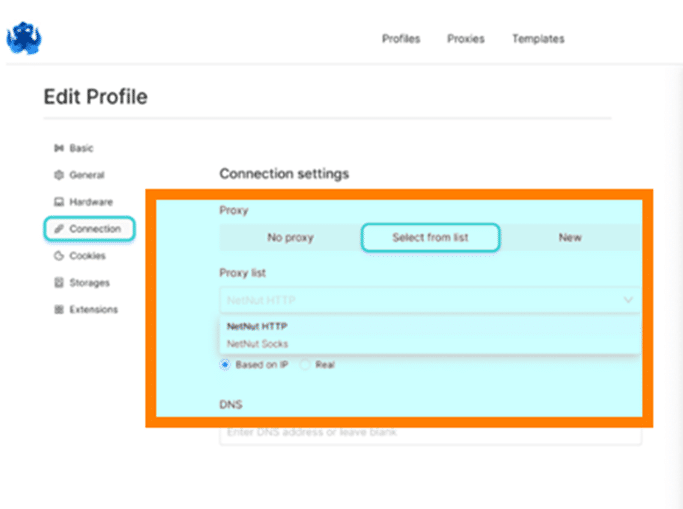
Step 11: Click on the Connection tab. To find the previously configured NetNut proxy, choose Select from list tab. Alternatively, you can click on New to configure another proxy server. To save the profile settings, click on Create Profile

The configured NetNut proxy servers will be displayed from the list like this:
Step 12: Enjoy uninterrupted browsing with NetNut proxy server and Octo Browser by clicking Start

Conclusion
Octo-browser supports proxy integration and allows you to save your preferred proxy servers to automate IP rotation. This guide examined how to navigate the Octo Browser and integrate NetNut Proxies. However, if you have any questions, feel free to contact us; NetNut offers 24/7 support to our esteemed customers.
Do you want to learn how to integrate NetNut proxies with other tools? Be sure to check out other NetNut integrations.