What is BitBrowser?
BitBrowser is an antidetect browser; when you send a request to a website, an antidetect browser can modify the data the website receives, including your location, browser version, language and more.
E-commerce businesses need to manage their accounts across multiple platforms and can leverage BitBrowser to enjoy unlimited access to platforms without any issue of IP ban.
Each browser you open with BitBrowser has a different browser fingerprint. This anti-association between browsers makes the target website perceive your activity like it’s coming from other computers or users.
How To Integrate NetNut Proxies With BitBrowser
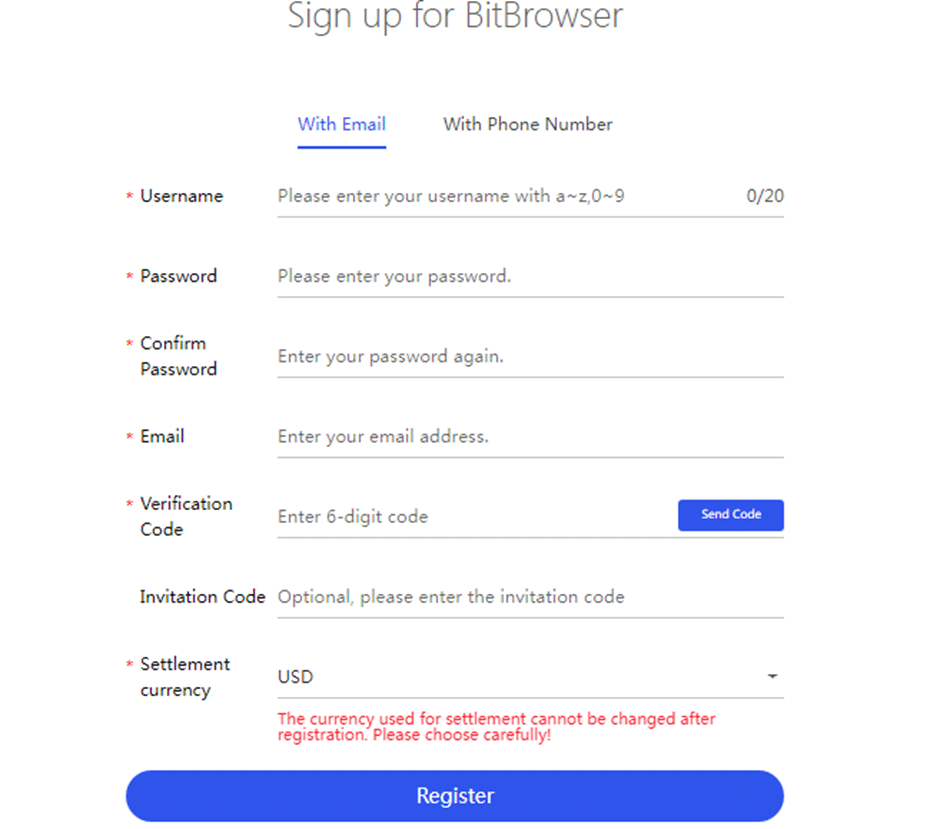
Step 1: Visit BitBrowser official page and register. You will be required to sign up with a valid email or phone number. Once you have successfully registered, you will receive a confirmation code on your email or phone number, depending on what you use to sign up.
Step 2: On the homepage, select “Download” from the menu. Here, you will find the version that suits your device operating system.

Step 3: Launch the BitBrowser on your device and login with your details. Alternatively, you can Sign up if you have not registered

Step 4: Select Browser Profile and click on +Add

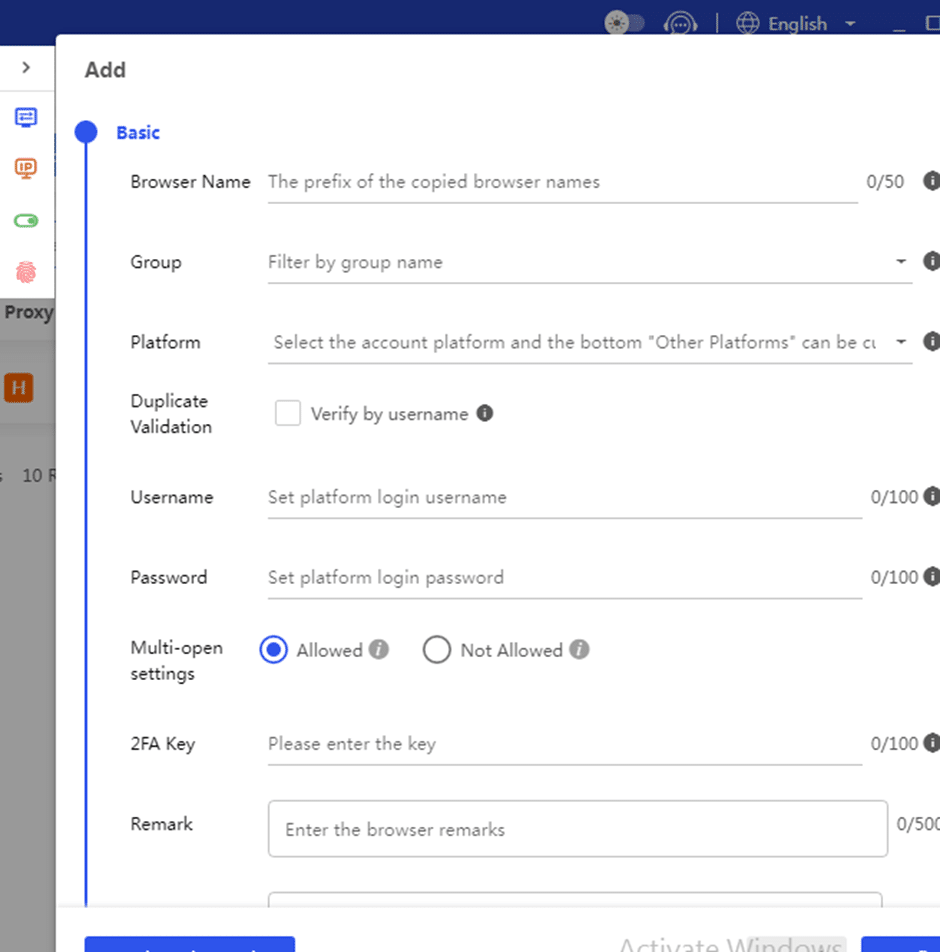
Step 5: Once you click on the “Add” option, a mini-window opens with three main sections, Basic, Proxy, Preferences, and Fingerprint.
Step 6: Go to Proxy and select your preferred proxy type. Since this is an integration with NetNut, bear in mind they support various protocols including HTTP/ HTTPS/SOCKS5.
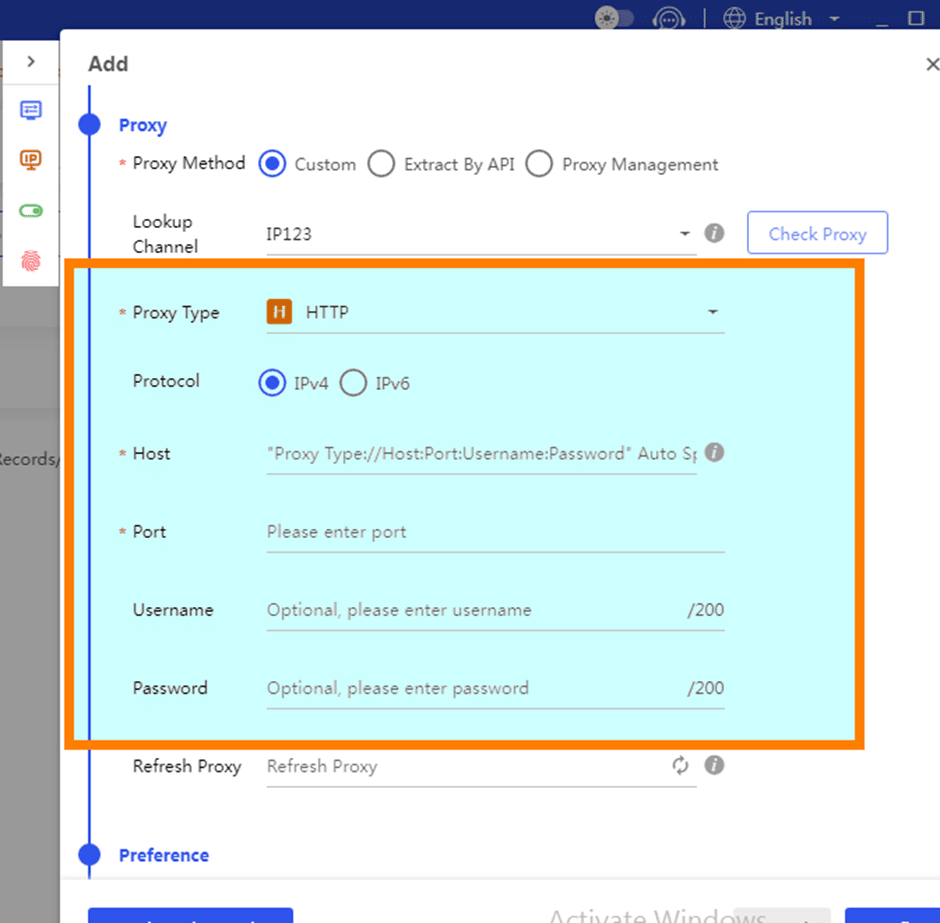
There are various proxy types so when integrating NetNut proxies, choose HTTP or SOCKS5 protocol
This is an example of a proxy string for a browser :
USERNAME-stc-uk-sid-123456789:PASSWORD@gw-am.ntnt.io:5959
-
Hostname Configuration
Copy the hostname/server address provided by NetNut
Example: Type gw-am.ntnt.io into the host field if you are using HTTP protocol. Alternatively, type gw-socks-am.ntnt.io for SOCKS5 protocol
-
Port number Configuration
The Port number for NetNut HTTP proxies is 5959 and 9595 for SOCKS5
-
Username Configuration
Username is your login, which you can find in your NetNut account in Settings -> Billing.
Proxy-type is the proxy type that you use. NetNut provides three different proxy types depending on your subscription plan. Your username should have three components including your user ID, type of proxy( residential, datacenter, static) and target country.
· dc — datacenter;
· res — rotating residential proxy;
· stc — static residential proxy.
Country is the country whose IP addresses will be used for connection. You can choose “Any,” in which case any available country will be used, or you can provide the ISO code of a specific country from the list of NetNut Available Countries: e.g., jp(Japan), fr(France).
Example: ticketing123-res-us
This is where you get the proxy username and password from the customer portal. You can also get in touch with your account manager if you’d like additional assistance.

-
Consistent IP session
While NetNut provides rotating IP addresses, you may want static IP address. This can be useful when you want to maintain your session via the same IPs. Then you need to incorporate a session id (SID) with your username.
How do you choose a SID?
- Choose a number between 4 to 8 digits
- Ensure the numbers are random and non-sequential to protect your IP address
For example: ticketing123-stc-us-SID-435765
-
Proxy password
Insert the confidential NetNut proxy password
Step 7: Go to Preferences if you need to modify any other settings. Make the necessary changes and click the Confirm button to save your updated profile.

Step 8: The new browser profile you created will appear under the Browser Profile. Select Open on the right side of the profile you created to start browsing.
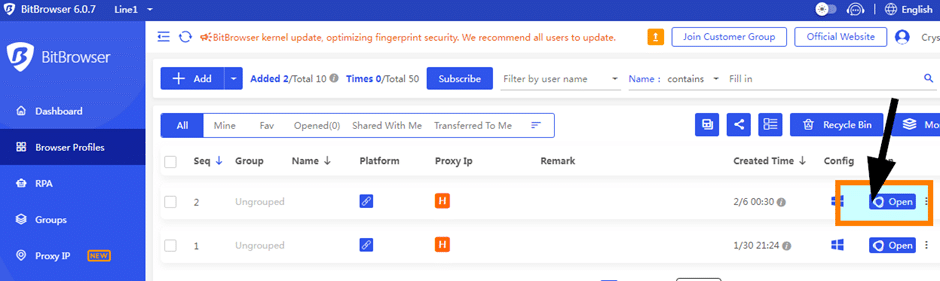
Step 9: Congratulations, you have successfully integrated the NetNut proxy server on BitBrowser.
Conclusion
Integrating NetNut proxies with BitBrowser allows you to manage multiple accounts and gather data while maintaining anonymity. NetNut offers automated proxy rotation so that you have access to a new IP address. In addition, powering BitBrowser with NetNut proxies allows you to access web pages from your preferred country by using IP addresses from these locations.
Check out other “how to” articles to learn how to integrate NetNut proxies with other browsers.
Feel free to contact us if you have questions about choosing the best proxy solution for your needs.