Introduction to AdsPower Anti-detect Browser
AdsPower is one of the most popular and reliable anti-detect browsers. It provides a secure environment for users to browse the internet without leaving digital footprints. Subsequently, a single click can manage numerous social media accounts with the AdsPower browser.
AdsPower anti-detect browser works by altering your digital fingerprint parameters, including user agents, operating system, and IP address. Therefore, they eliminate any chance of exposing your digital identity, which helps prevent IP bans.
This guide will provide a step-by-step guide on integrating NetNut proxies on AdsPower.
What IS AdsPower Browser?
AdsPower Browser is an advanced anti-detect browser designed to provide a secure and anonymous browsing environment for managing multiple online accounts. It achieves this by altering digital fingerprints, such as user agents, operating systems, and IP addresses, to prevent websites from linking multiple accounts to the same user. This browser is particularly useful for digital marketers, e-commerce professionals, and social media managers who need to manage numerous profiles without risking detection or account bans. AdsPower ensures that each browser session remains isolated, enhancing privacy and operational efficiency.
Benefits of Using NetNut Proxies With AdsPower Browser
Integrating NetNut proxies with AdsPower Browser offers significant advantages for managing multiple online accounts securely and efficiently. NetNut proxies provide high-speed, reliable residential IPs that enhance anonymity by masking your real IP address. This is crucial for avoiding detection and bans while managing multiple accounts across various platforms. The combination ensures seamless browsing, reduces the risk of IP bans, and allows access to geo-restricted content. Using NetNut proxies with AdsPower also improves operational efficiency by ensuring that each browser session has a unique IP address, preventing account linkage and enhancing privacy.
Understanding NetNut Proxy Configuration
There are various proxy types so when integrating NetNut proxies, choose HTTP or SOCKS5 protocol.
This is an example of a proxy string for a browser :
USERNAME-stc-uk-sid-123456789:PASSWORD@gw-am.netnut.net:5959
Step 1: Hostname Configuration
Copy the hostname/server address provided by NetNut
Example: Type gw-am.netnut.net into the host field if you are using HTTP protocol. Alternatively, type gw-socks-am.netnut.net for SOCKS5 protocol
Step 2: Port number Configuration
The Port number for NetNut HTTP proxies is 5959 and 9595 for SOCKS5
Step 3: Username Configuration
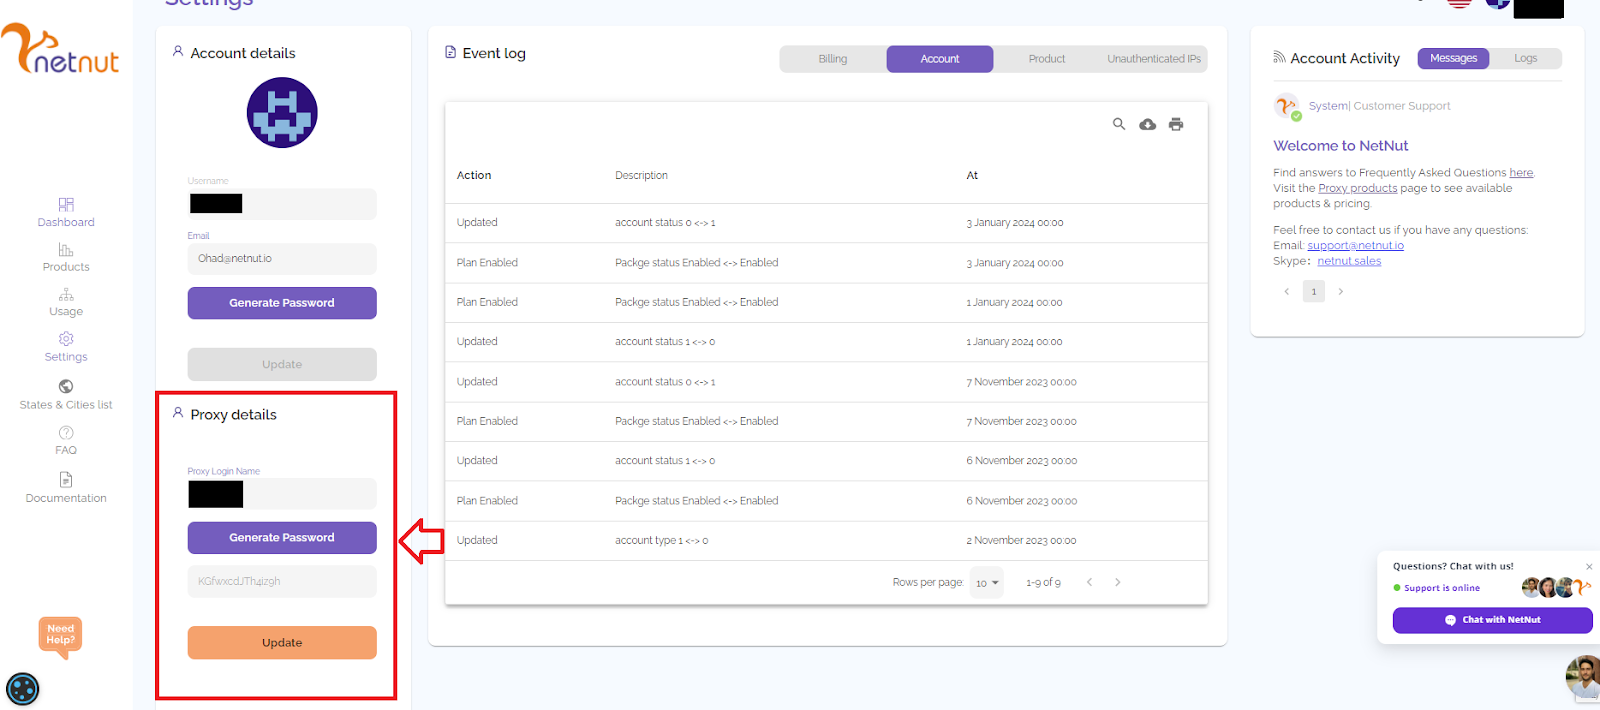
Username is your login, which you can find in your NetNut account in Settings -> Billing.
Proxy-type is the proxy type that you use. NetNut provides three different proxy types depending on your subscription plan. Your username should have three components including your user ID, type of proxy( residential, datacenter, static) and target country.
- dc — datacenter;
- res — rotating residential proxy;
- stc — static residential proxy.
Country is the country whose IP addresses will be used for connection. You can choose “Any,” in which case any available country will be used, or you can provide the ISO code of a specific country from the list of NetNut’s available countries: e.g., jp (Japan), fr (France).
Example: ticketing123-res-us
This is where you get the proxy username and password from the customer portal. You can also get in touch with your account manager if you’d like additional assistance.
Step 4: Consistent IP session
While NetNut provides rotating IP addresses, you may want a static IP address. This can be useful when you want to maintain your session via the same IPs. Then you need to incorporate a session id (SID) with your username.
How do you choose a SID?
- Choose a number between 4 to 8 digits
- Ensure the numbers are random and non-sequential to protect your IP address
For example: ticketing123-stc-us-SID-435765
Step 5: Proxy password
Insert the confidential NetNut proxy password
Configuring Proxy Servers on AdsPower Anti-detect Browser
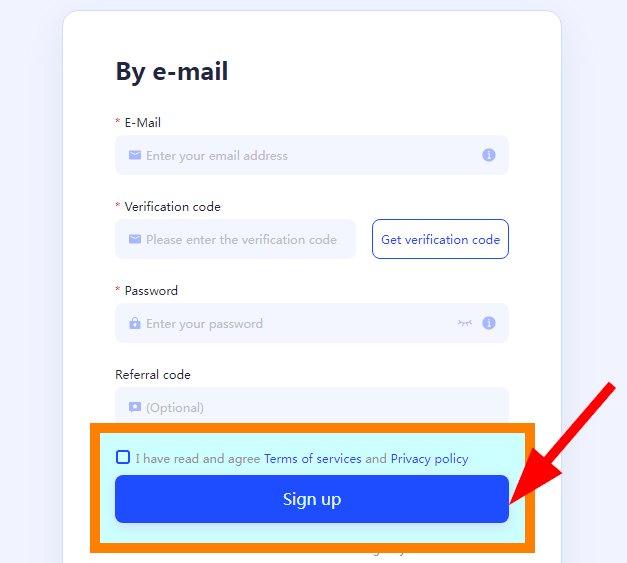
Step 1: Go to AdsPower website to download the app and sign up.

Step 2: Click on Sign up as highlighted in the previous image. Fill out all the required fields to create an AdsPower account.
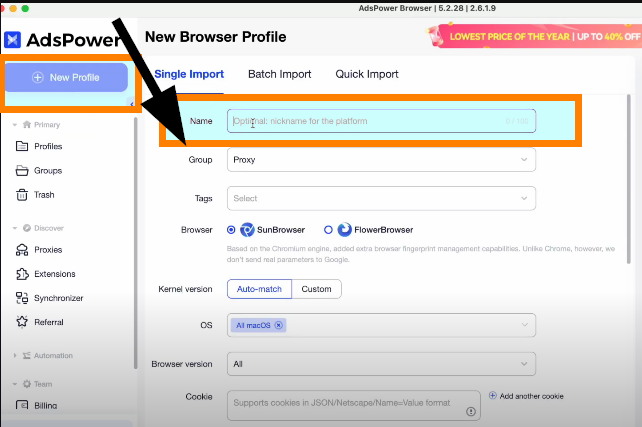
Step 3: By this time, the AdsPower browser download must be complete. Install and launch the app on your device. Click on New Profile and type in your preferred Profile name.
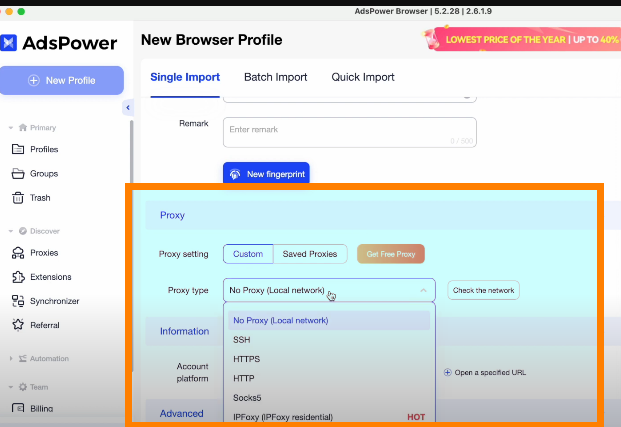
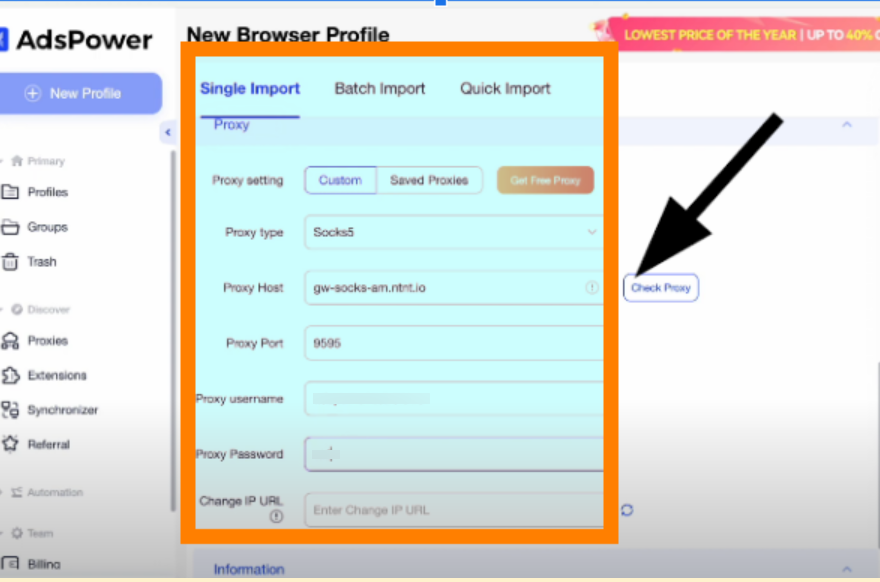
Step 4: On the same page, scroll down to Proxy and enter the NetNut proxy information from your dashboard.
Step 6: Once you have put in all your proxy details, click on Check proxy to confirm if it is working. You can proceed if you see this message: Connection test passed.
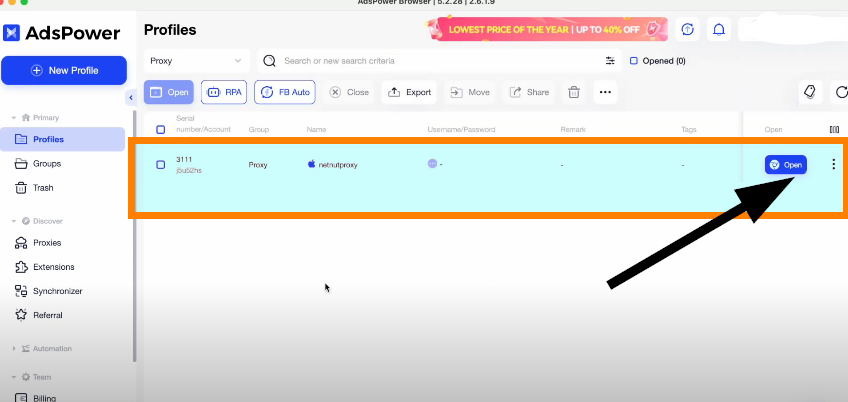
Step 7: Save the settings and you can find the profile on your AdsPower Dashboard. Click Open to enjoy anonymous browsing.
Conclusion
AdsPower is a powerful anti-detect browser that allows you to use thousands of accounts on one device. It allows you to control all fingerprint parameters on each profile. To get the best from AdsPower, you need to integrate it with a reliable proxy like NetNut.
If you have any questions, feel free to contact us; NetNut offers 24/7 support to our esteemed customers.
Do you want to learn how to integrate NetNut proxies with other tools? Be sure to check out other NetNut integrations.