Configuring proxy settings in Firefox can significantly enhance your browsing experience by improving privacy, security, and access to region-restricted content. This guide will walk you through the steps to set up a proxy server in Firefox, helping you make the most of this powerful feature.
What is Firefox?
Firefox has been in existence for over a decade and has since then positioned itself as a user-friendly browser, emphasizing privacy, security, and customizability. One of the defining features of Firefox is its unwavering commitment to user privacy. The browser comes equipped with a range of tools and settings designed to protect users from online tracking, unwanted data collection, and malicious threats.
From the Enhanced Tracking Protection feature to strict cookie policies, Firefox endeavors to create a secure environment for users to explore the web. This article provides a comprehensive guide on how to configure your NetNut proxy on Firefox.
What Is A Firefox Proxy?
A Firefox proxy is an intermediary server that routes your internet traffic through a different IP address before reaching its destination. By configuring a proxy in Firefox, you can mask your real IP address, making it appear as though you are browsing from a different location. This can be particularly useful for accessing geo-restricted content, maintaining online anonymity, and improving security by hiding your actual IP address from potential threats.
What Are The Benefits of Using A Proxy Server on Firefox?
Using a proxy server on Firefox offers numerous benefits. It enhances online privacy by masking your IP address, making it harder for websites and third parties to track your online activities. Proxies can also bypass geo-restrictions, allowing you to access content that may be blocked in your region. Additionally, proxies can improve security by protecting your data from potential cyber threats and reducing the risk of malicious attacks. For businesses, proxies enable efficient web scraping, competitive analysis, and monitoring of online activities without revealing their identity.
How To Set Up A Proxy Server on Firefox with NetNut Proxy Configuration
There are various proxy types so when integrating NetNut proxies, choose HTTP or SOCKS5 protocol.
This is an example of a proxy string for a browser:
USERNAME-stc-uk-sid-123456789:PASSWORD@gw-am.netnut.net:5959
Step 1: Hostname Configuration
Copy the hostname/server address provided by NetNut
Example: Type gw-am.netnut.net into the host field if you are using HTTP protocol. Alternatively, type gw-socks-am.netnut.net for SOCKS5 protocol
Step 2: Port number Configuration
The Port number for NetNut HTTP proxies is 5959 and 9595 for SOCKS5
Step 3: Username Configuration
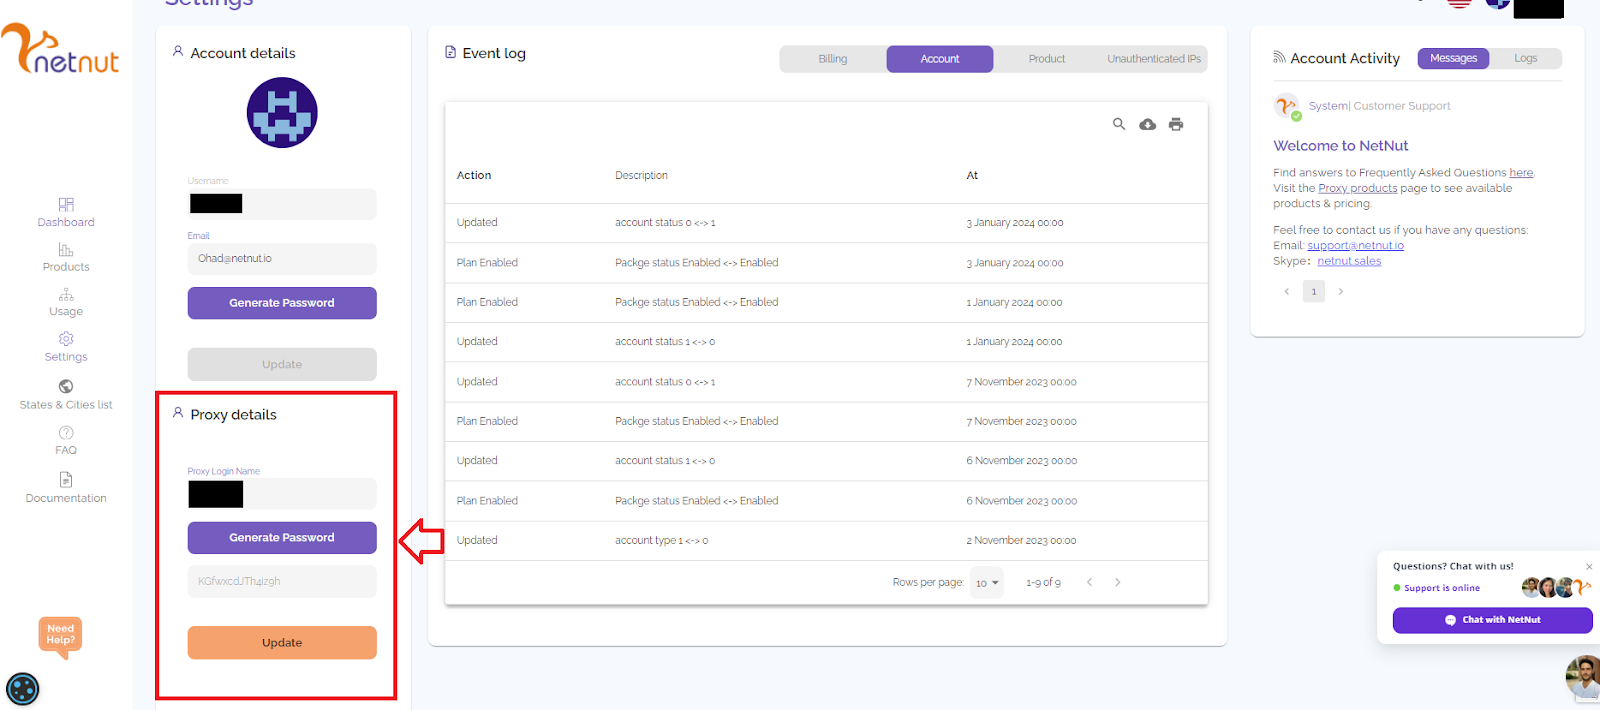
Username is your login, which you can find in your NetNut account in Settings -> Billing.
Proxy-type is the proxy type that you use. NetNut provides three different proxy types depending on your subscription plan. Your username should have three components including your user ID, type of proxy (residential, datacenter, static) and target country.
- dc — datacenter;
- res — rotating residential proxy;
- stc — static residential proxy.
Country is the country whose IP addresses will be used for connection. You can choose “Any,” in which case any available country will be used, or you can provide the ISO code of a specific country from the list of NetNut’s available countries: e.g., jp (Japan), fr (France).
Example: ticketing123-res-us
This is where you get the proxy username and password from the customer portal. You can also get in touch with your account manager if you’d like additional assistance.
Step 4: Consistent IP session
While NetNut provides rotating IP addresses, you may want a static IP address. This can be useful when you want to maintain your session via the same IPs. Then you need to incorporate a session id (SID) with your username.
How do you choose a SID?
- Choose a number between 4 to 8 digits
- Ensure the numbers are random and non-sequential to protect your IP address
For example: ticketing123-stc-us-SID-435765
Step 5: Proxy password
Insert the confidential NetNut proxy password
How to Set Up Proxy Settings On Firefox
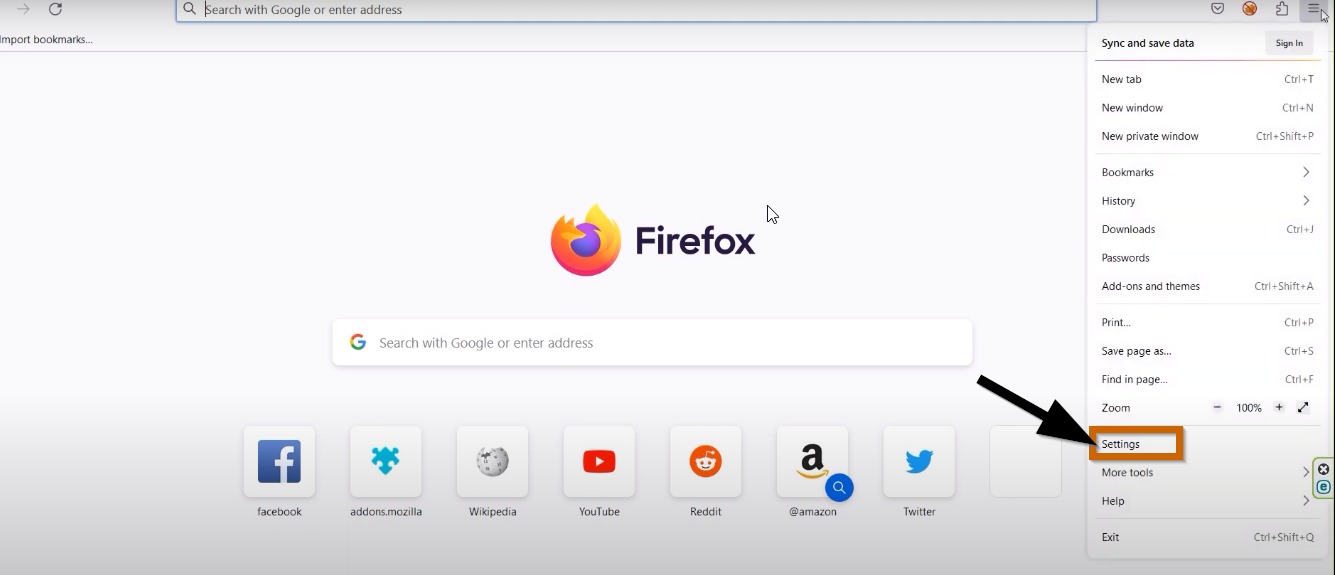
Step 1: Download the Firefox browser and install the browser on your PC. From the homepage of the browser, click on ‘menu’ on the top right corner. Then select ‘Settings’.
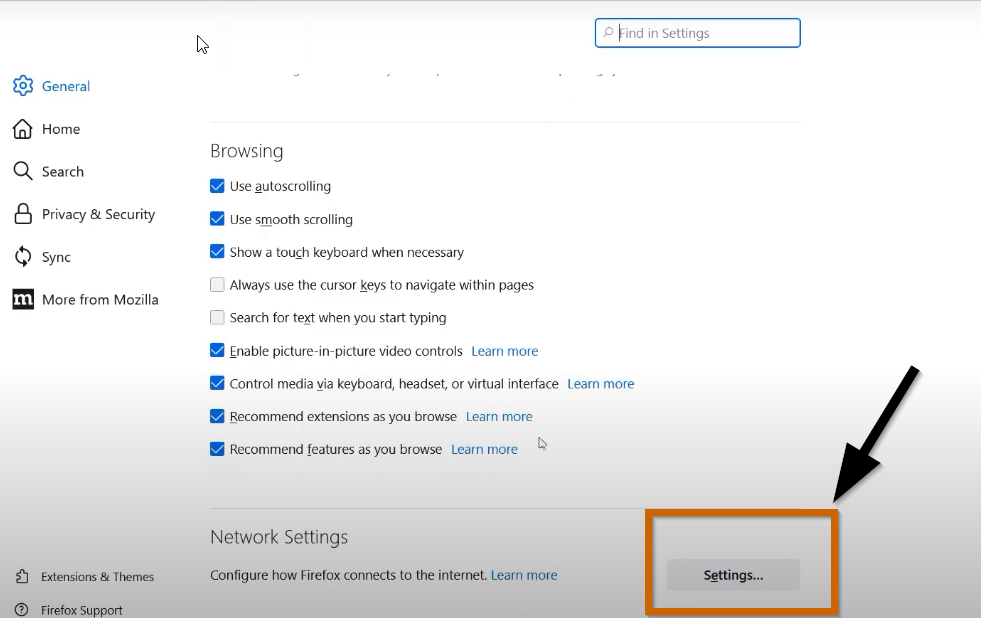
Step 3: Navigate to ‘Network settings’ at the bottom of the settings page and select ‘Settings’
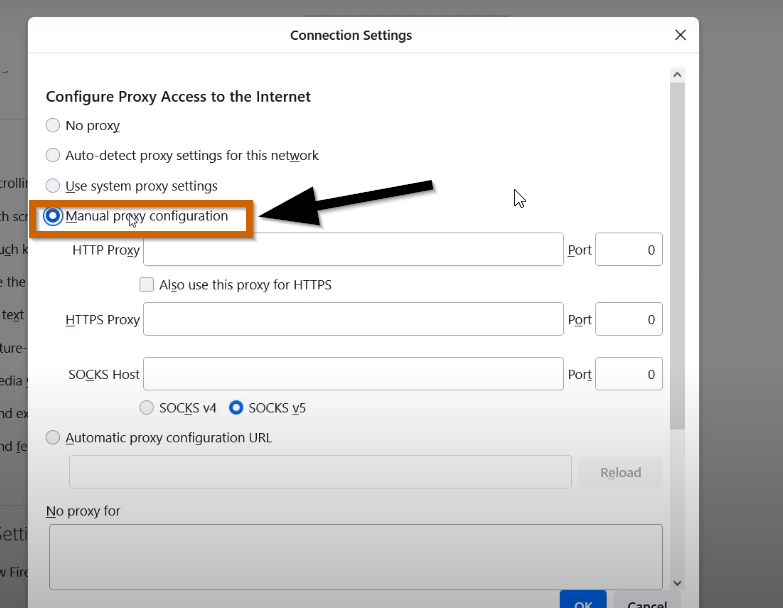
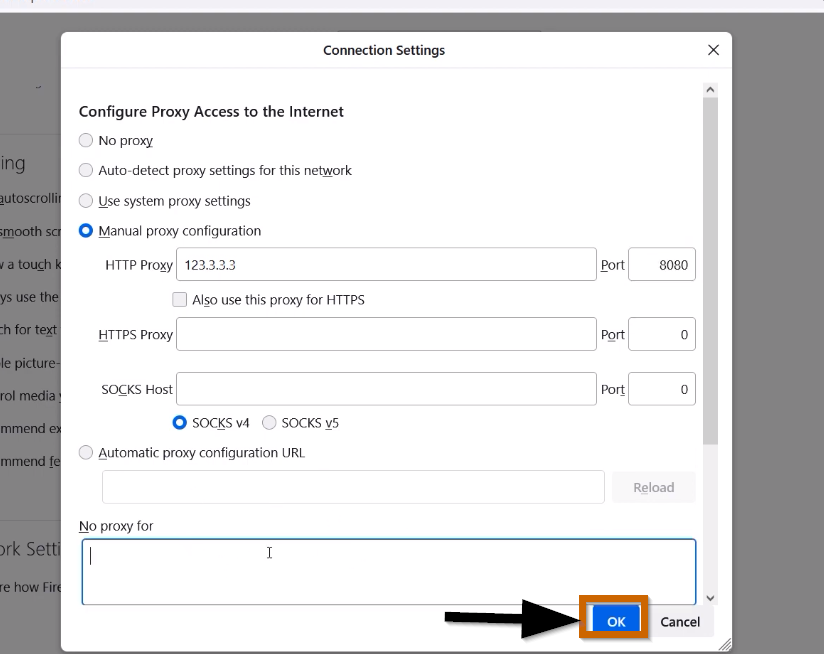
Step 4: To setup the proxy configuration, enable ‘manual configuration’
Enter the Proxy details as described in the first section of this guide on NetNut configuration
Step 5: After filing the details, click on ‘OK’ and your proxy settings will be saved automatically.
Step 6: Launch a browser to authenticate your proxy settings. Enter your NetNut credentials including username and password and Sign in
Congratulations! Now you can browse the internet using the configured proxy.
Final Thoughts on Using A Proxy For Firefox
Configuring proxy settings on Firefox is an additional step towards reclaiming control over your online privacy. By implementing these settings, you not only shield your online activities from prying eyes but also unlock a series of opportunities for accessing region-restricted content and maintaining a more secure online presence.
Explore additional “how-to” articles for insights on how to integrate NetNut proxies with different browsers.
Should you have inquiries about selecting the optimal proxy solution for your requirements, don’t hesitate to contact us.


