What is Internet Explorer?
Internet Explorer is one of the most popular and old browsers. It was launched by Microsoft in 1995. However, by 2016, Microsoft stopped all forms of active technical support for the browser. Subsequently, it was replaced with Microsoft Edge.
Although Internet Explorer is often described as outdated, many people still use it. Therefore, learning how to optimize security and privacy becomes crucial when using the browser. One of the simplest ways to do this is through proxies. Therefore, this guide will examine how to set up NetNut proxies on Internet Explorer.
Understanding NetNut Proxy Configuration
There are various proxy types so when integrating NetNut proxies, choose HTTP or SOCKS5 protocol.
This is an example of a proxy string for a browser:
USERNAME-stc-uk-sid-123456789:PASSWORD@gw-am.netnut.net:5959
Step 1: Hostname Configuration
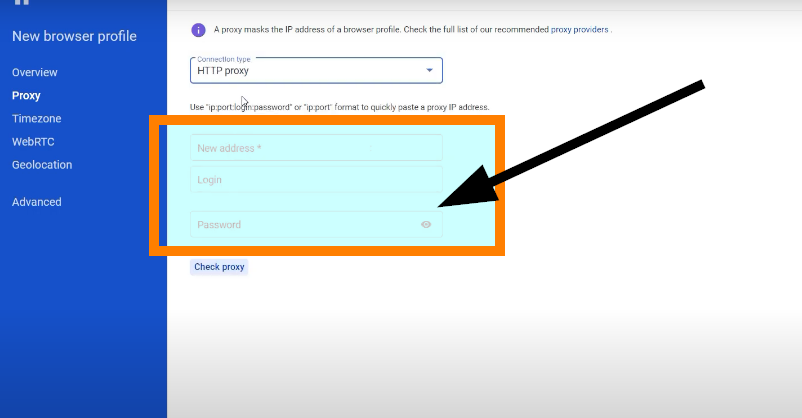
Copy the hostname/server address provided by NetNut
Example: Type gw-am.netnut.net into the host field if you are using HTTP protocol. Alternatively, type gw-socks-am.netnut.net for SOCKS5 protocol
Step 2: Port number Configuration
The Port number for NetNut HTTP proxies is 5959 and 9595 for SOCKS5
Step 3: Username Configuration
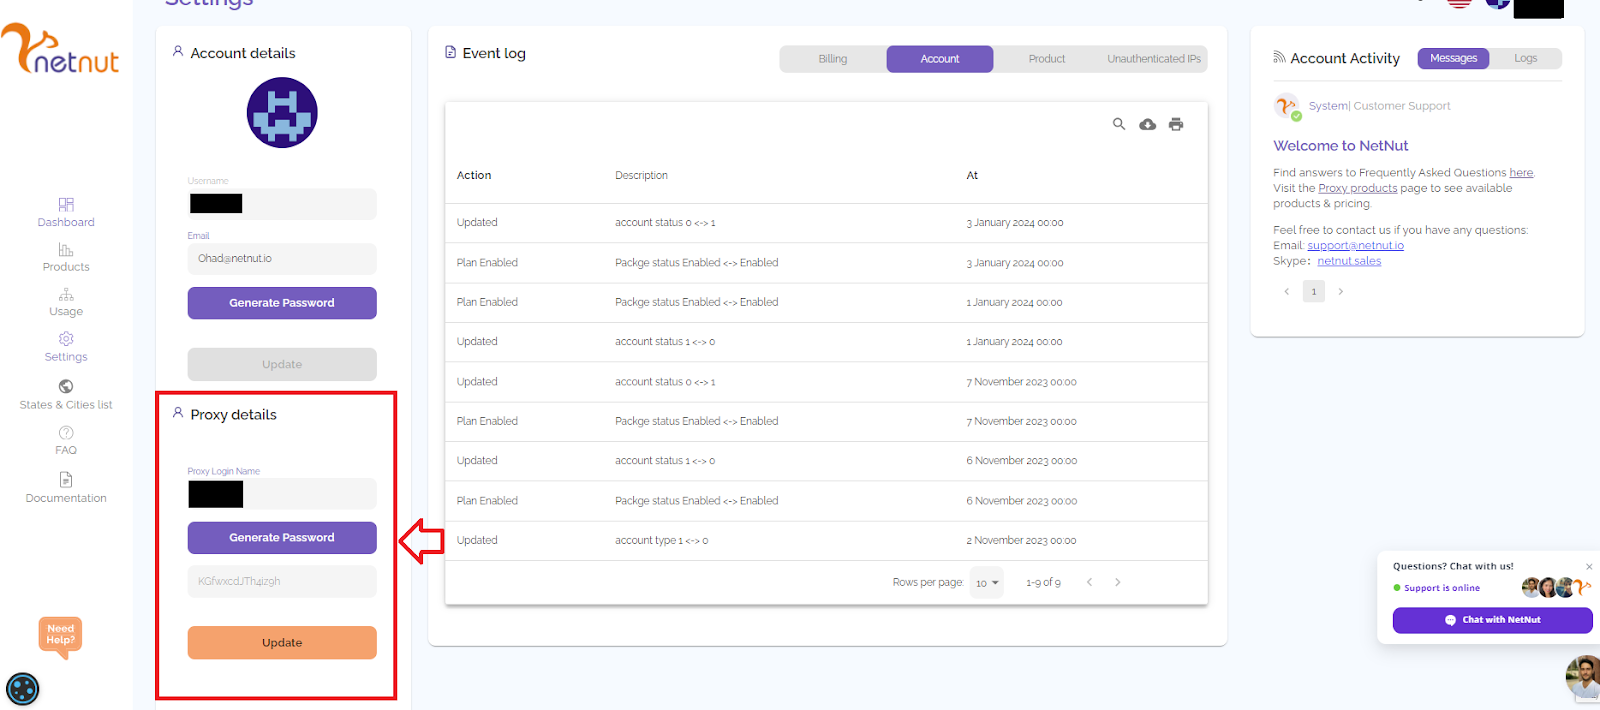
Username is your login, which you can find in your NetNut account in Settings -> Billing.
Proxy-type is the proxy type that you use. NetNut provides three different proxy types depending on your subscription plan. Your username should have three components including your user ID, type of proxy( residential, datacenter, static) and target country.
- dc — datacenter;
- res — rotating residential proxy;
- stc — static residential proxy.
Country is the country whose IP addresses will be used for connection. You can choose “Any,” in which case any available country will be used, or you can provide the ISO code of a specific country from the list of NetNut’s available countries: e.g., jp (Japan), fr (France).
Example: ticketing123-res-us
This is where you get the proxy username and password from the customer portal. You can also get in touch with your account manager if you’d like additional assistance.
Step 4: Consistent IP session
While NetNut provides rotating IP addresses, you may want a static IP address. This can be useful when you want to maintain your session via the same IPs. Then you need to incorporate a session id (SID) with your username.
How do you choose a SID?
- Choose a number between 4 to 8 digits
- Ensure the numbers are random and non-sequential to protect your IP address
For example: ticketing123-stc-us-SID-435765
Step 5: Proxy password
Insert the confidential NetNut proxy password
How to Setup NetNut Proxies on Internet Explorer
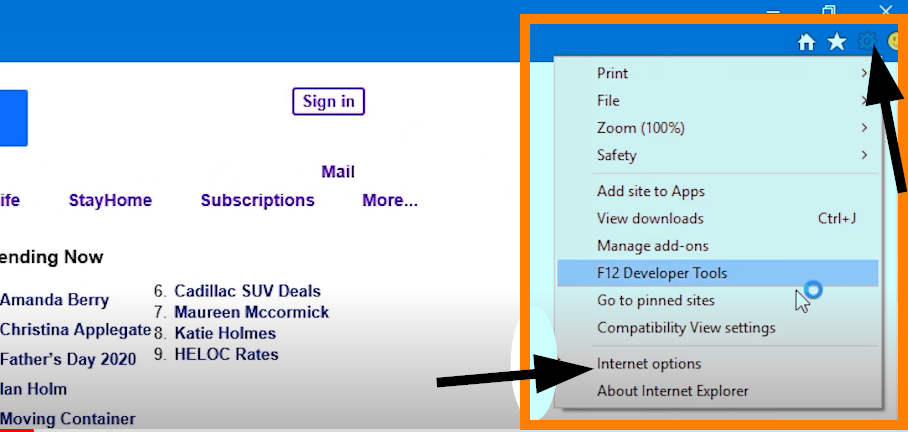
Step 1: Launch the Internet Explorer and click on the Settings icon on the upper left corner of the screen. From the drop-down menu, select Internet options
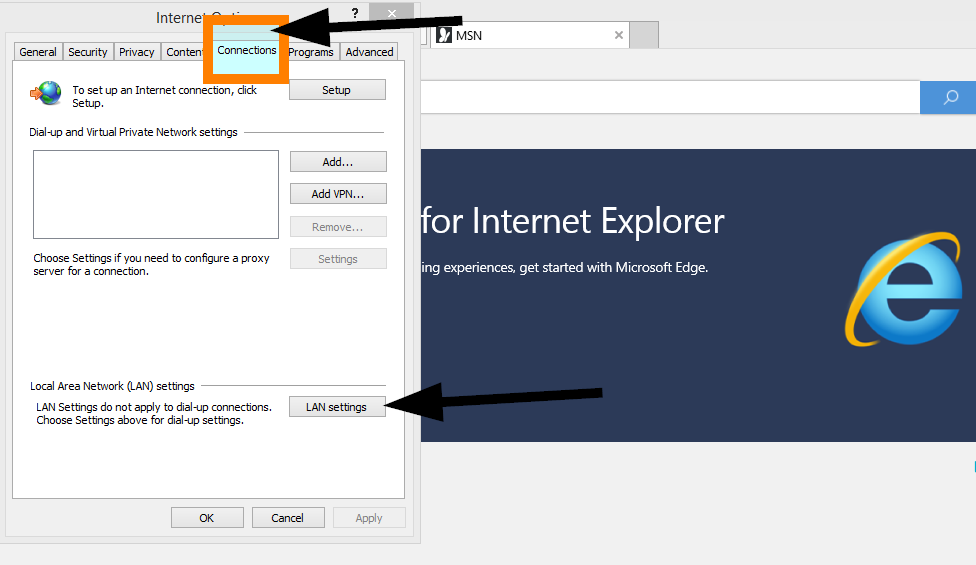
Step 2: From the tabs, select Connection and click on LAN settings
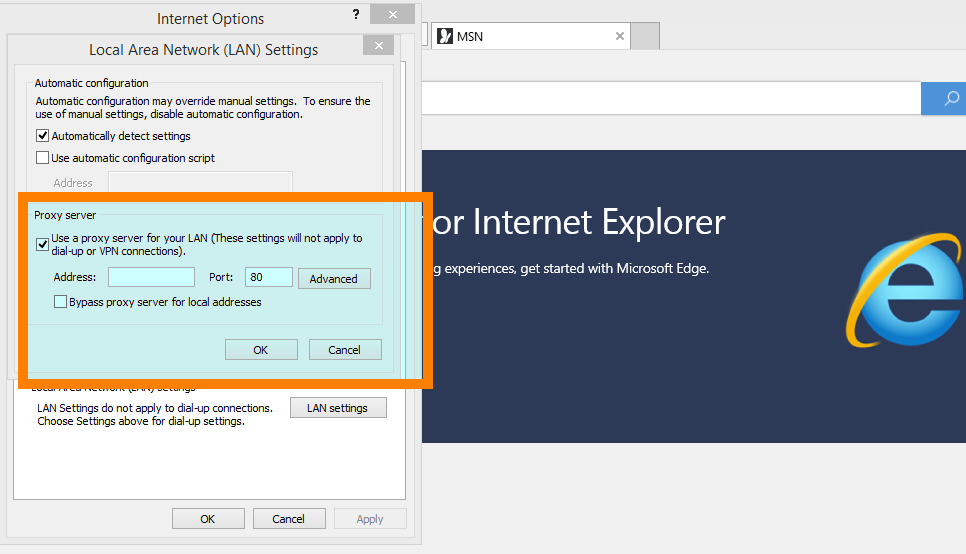
Step 3: A new mini-window will pop-up and tick the box to enable Proxy server for your LAN. Enter the proxy IP and port
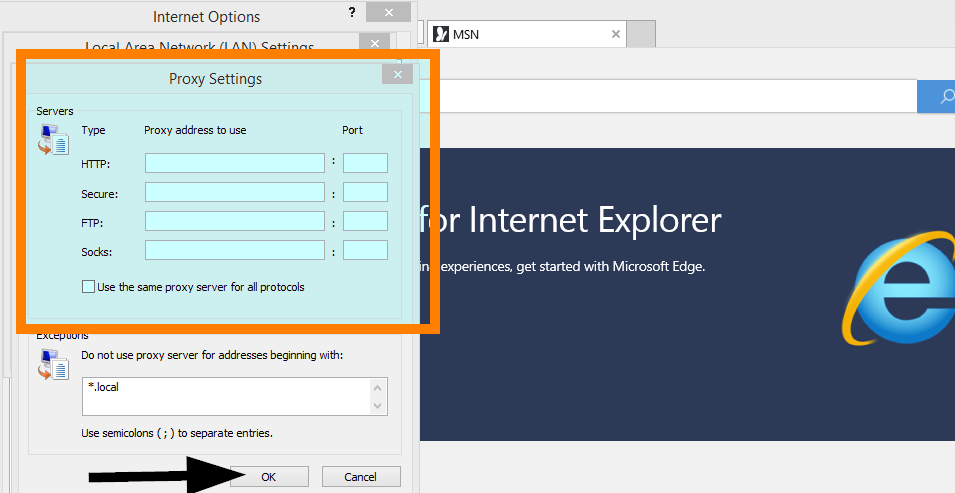
Step 4: Click on Advanced to choose proxy type and click OK
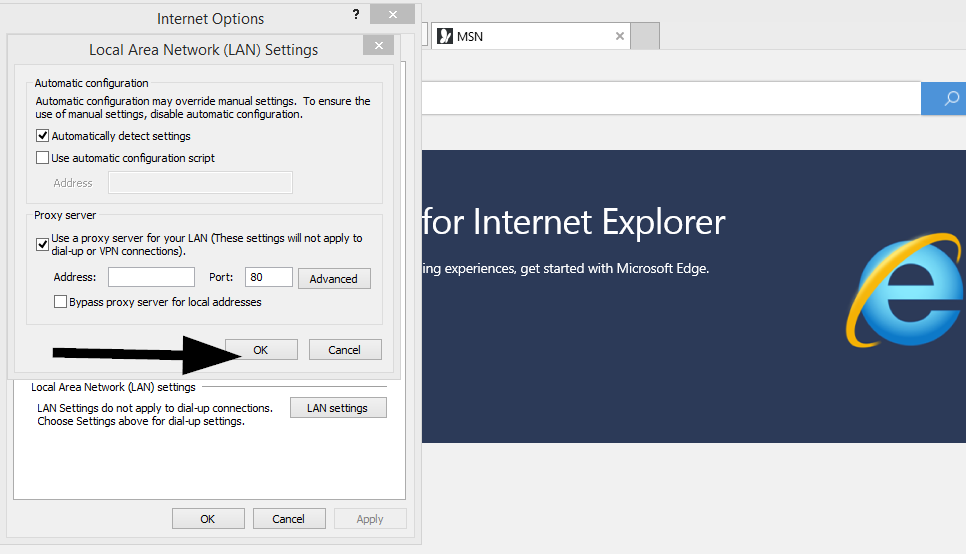
Step 5: Click Ok on the LAN settings page
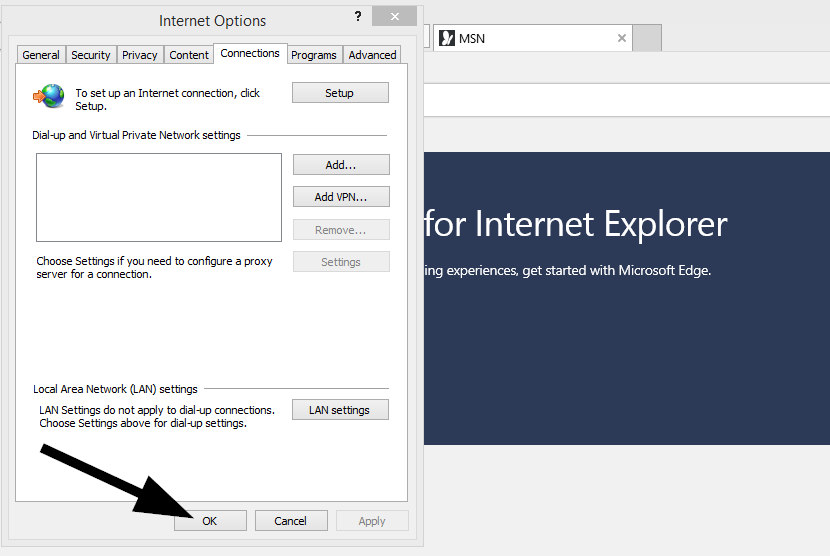
Step 6: Click on Ok to save the configurations
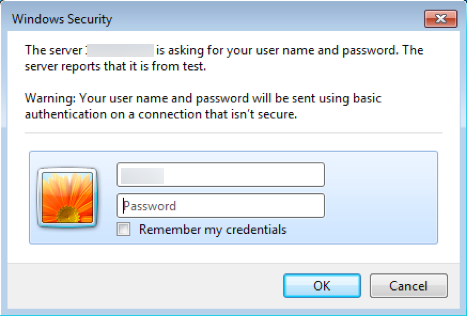
Step 7: Launch a browser to authenticate your proxy settings. Enter your NetNut credentials including username and password and Sign in.
Now, you can experience privacy and security while using the Internet Explorer
Conclusion
This guide has examined how to navigate the NetNut dashboard to collect the proxy details. In addition, it also provided a step-by-step guide you can follow to configure NetNut proxies on your Safari Browser.
However, if you have any questions, feel free to contact us as we provide 24/7 support to our esteemed customers. Do you have other apps or tools that can be optimized with proxies? Be sure to check out other NetNut integrations.


