Introduction to VMLogin Anti-detect Browser
The growing concerns of individuals and businesses towards online security and data privacy have led to an increase in the adoption of anti-detect browsers. These browsers are designed to mask your browser fingerprint and hide your actual IP address, which allows you to surf the internet more privately and securely.
You can automate VMLogin through Selenium, which makes it an ideal tool for businesses that need a tool to automate repetitive tasks. Therefore, VMLogin is suitable for e-commerce, affiliate marketing, brand protection, ad verification, social media marketing, web scraping, and more.
VMLogin does not come with a proxy server, so you need access to proxy IP addresses for anonymous browsing. While several free proxies are in the market, they are associated with risks, including personal data breaches, lack of encryption, and others. Therefore, choosing a reputable proxy provider like NetNut becomes critical.
This guide will examine how to integrate NetNut proxies with VMLogin so you can browse without compromising anonymity, security, and privacy.
How to Setup NetNut Proxies on VMLogin
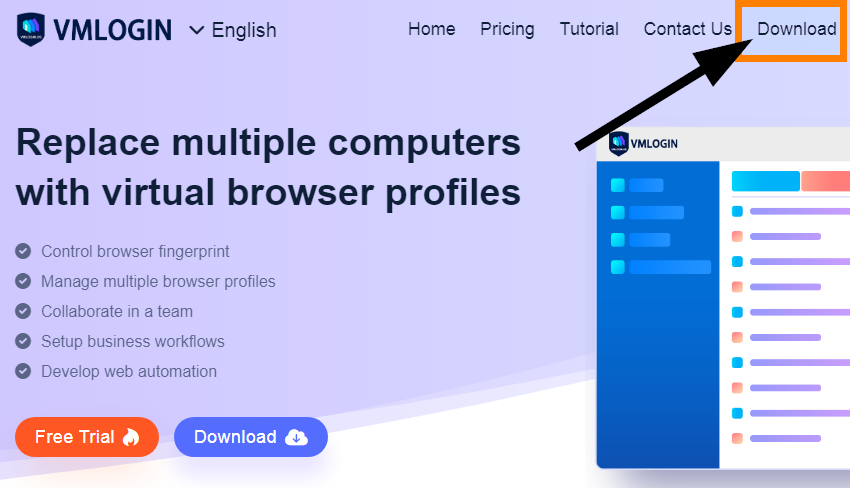
Step 1: Go to the VMLogin website and select Download to install the app on your device. This anti-detect browser currently supports Windows, macOS, Linux, Android and iOS, and other operating systems.
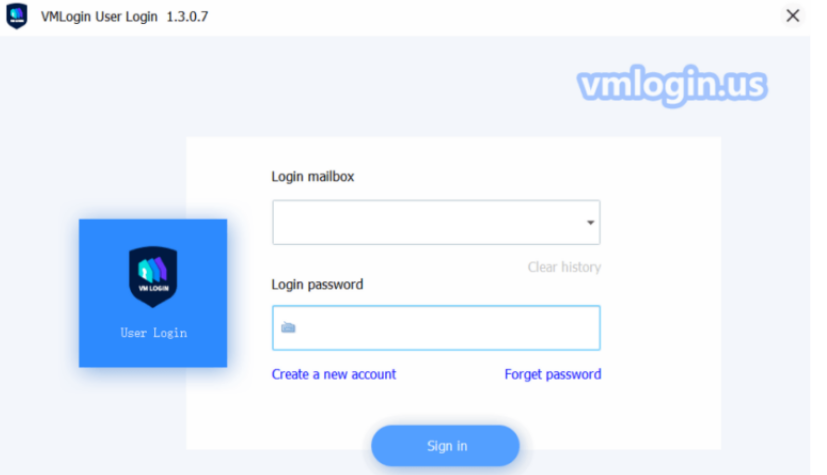
Step 2: Launch the VMLogin app and select create a new account to sign up or simply sign in if you already have an account.
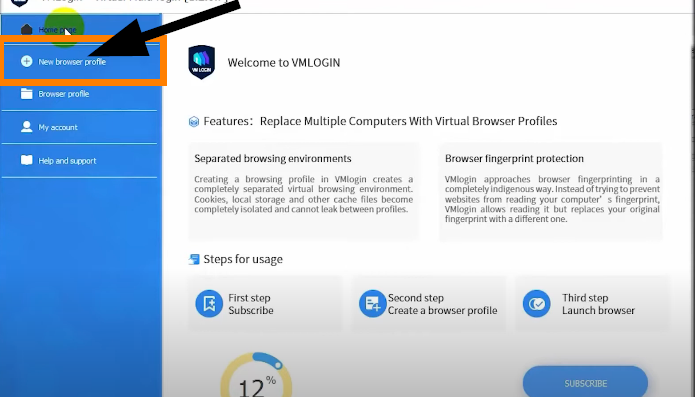
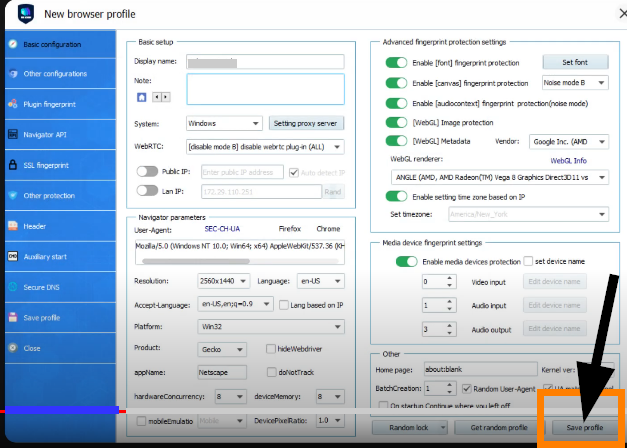
Step 3: Click on New browser profile on the left side of the dashboard (under the Home page tab).
Step 4: Under the Basic configuration, select your device operating system and click on setting proxy server.

Step 5: A new mini-window will pop-up and you need to toggle on the Enable proxy server option. Supply the proxy type, IP address, Port, username and password provided by NetNut proxy service provider. Select Test Proxy to confirm the connection and click on Save to apply changes to the profile.

There are various proxy types so when integrating NetNut proxies, choose HTTP or SOCKS5 protocol
This is an example of a proxy string for a browser :
USERNAME-stc-uk-sid-123456789:PASSWORD@gw-am.netnut.net:5959
-
Hostname Configuration
Copy the hostname/server address provided by NetNut
Example: Type gw-am.netnut.net into the host field if you are using HTTP protocol. Alternatively, type gw-socks-am.netnut.net for SOCKS5 protocol
-
Port number Configuration
The Port number for NetNut HTTP proxies is 5959 and 9595 for SOCKS5
-
Username Configuration
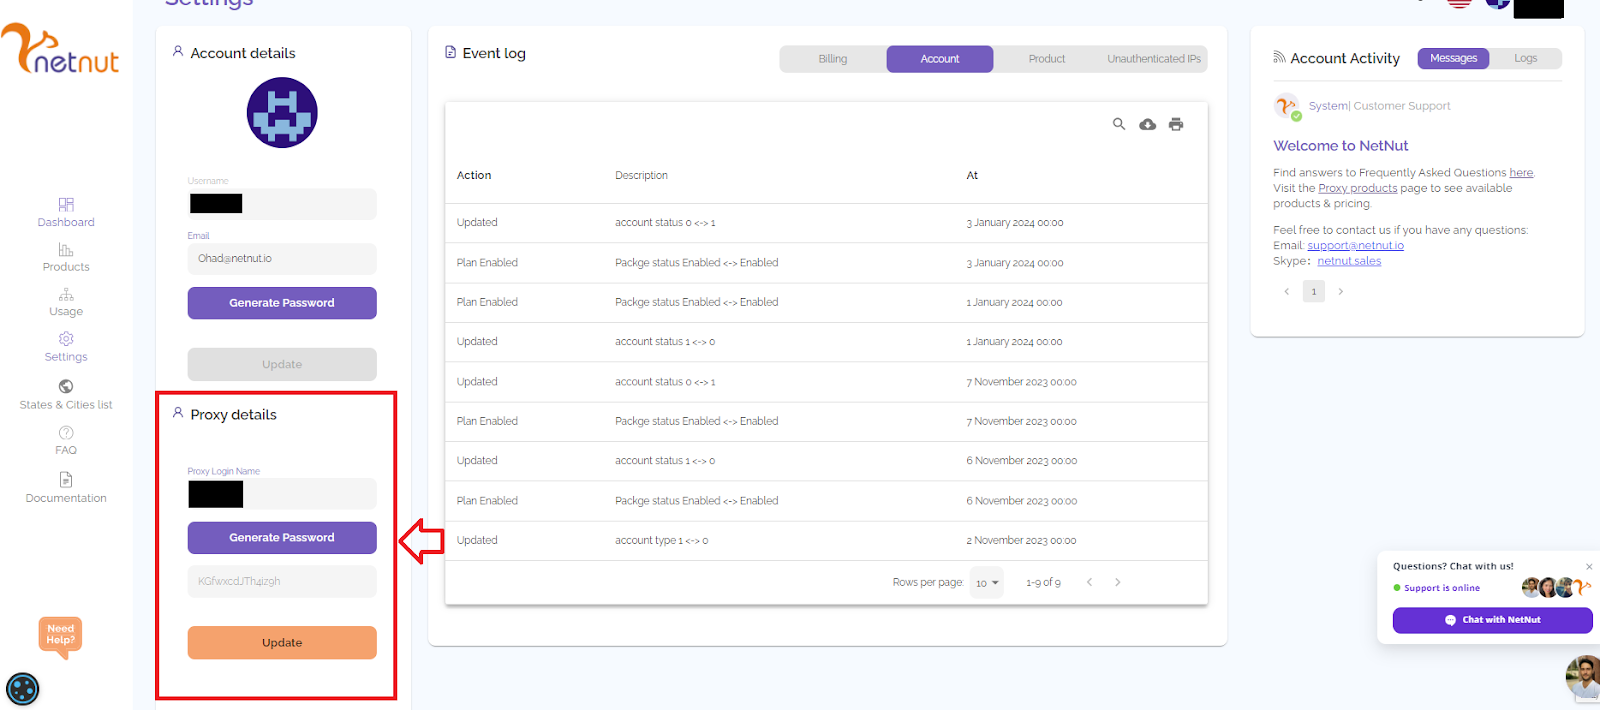
Username is your login, which you can find in your NetNut account in Settings -> Billing.
Proxy-type is the proxy type that you use. NetNut provides three different proxy types depending on your subscription plan. Your username should have three components including your user ID, type of proxy( residential, datacenter, static) and target country.
- dc — datacenter;
- res — rotating residential proxy;
- stc — static residential proxy.
Country is the country whose IP addresses will be used for connection. You can choose “Any,” in which case any available country will be used, or you can provide the ISO code of a specific country from the list of NetNut Available Countries: e.g., jp(Japan), fr(France).
Example: ticketing123-res-us
This is where you get the proxy username and password from the customer portal. You can also get in touch with your account manager if you’d like additional assistance.
-
Consistent IP session
While NetNut provides rotating IP addresses, you may want static IP address. This can be useful when you want to maintain your session via the same IPs. Then you need to incorporate a session id (SID) with your username.
How do you choose a SID?
- Choose a number between 4 to 8 digits
- Ensure the numbers are random and non-sequential to protect your IP address
For example: ticketing123-stc-us-SID-435765
-
Proxy password
Insert the confidential NetNut proxy password
Tip: If the proxy is working, you will receive a message with a green symbol

Step 6: Tweak the remaining settings on the page and click on Save profile on the bottom right-side of the page to enjoy the benefits of integrating NetNut Proxies to VMLogin browser.
What Is VMLogin?
VMLogin is a specialized browser management tool designed for users who need to operate multiple online accounts simultaneously while maintaining a high level of privacy and anonymity. It allows users to create and manage separate browser profiles, each with its own unique fingerprint, cookies, user-agent strings, and other settings that simulate distinct devices and environments. This makes it possible to manage multiple social media accounts, ecommerce platforms, or other online identities without the risk of cross-account detection or bans.
VMLogin is particularly useful for activities such as web scraping, digital marketing, and competitive intelligence, where managing multiple accounts or personas is essential. By isolating each browser profile, VMLogin ensures that cookies, browsing history, and other identifiable information do not leak between profiles, thus maintaining the integrity and anonymity of each account. This tool is valuable for businesses and individuals who require a reliable solution to operate multiple identities on the web without compromising security or facing account restrictions.
Benefits of Using NetNut Proxies With VMLogin
Integrating NetNut proxies with VMLogin enhances the effectiveness and security of managing multiple online accounts by providing robust, high-performance IP masking. One of the primary benefits of using NetNut proxies with VMLogin is the ability to rotate residential IP addresses, which are less likely to be flagged or blocked by websites compared to data center IPs. This is crucial when managing multiple accounts, as it prevents the linking of activities across different profiles due to a shared IP address.
NetNut’s residential proxies are known for their speed and reliability, ensuring that your connections remain stable and fast, even when managing a large number of accounts. This is particularly important for users who engage in activities such as web scraping or bulk account management, where maintaining uninterrupted access to the web is essential for productivity.
Additionally, NetNut proxies offer a global network of IPs, allowing users to appear as though they are browsing from different geographic locations. This is advantageous for tasks that require access to region-specific content or for simulating users in different markets. By pairing VMLogin with NetNut proxies, users can effectively navigate geo-restrictions and ensure that their online activities are not limited by location-based access controls.
Another key benefit is the enhanced privacy and security that comes from using NetNut proxies. These proxies mask your true IP address, protecting your online identity and reducing the risk of being targeted by cyber threats. This level of anonymity is essential for users who need to conduct sensitive operations, such as competitive research or managing high-stakes online campaigns, without revealing their actual location or identity.
Final Thoughts on Setting Up VMLogin With NetNut Proxies
This guide has examined how to install the VMLogin browser and configure NetNut settings. However, if you have any questions, feel free to contact us; NetNut offers 24/7 support to our esteemed customers.
Do you want to learn how to integrate NetNut proxies with other tools? Be sure to check out other NetNut integrations.