Introduction
Postman is an API platform designed to create and use APIs. It stands out in the market because it simplifies the process of building an API. Therefore, you can create high-quality APIs faster. In addition, Postman offers a wide range of tools for beginners and experts who may want to build, test, or document APIs.
On the other hand, a proxy acts as an intermediary between a client application (like Postman) and the destination server (like an API). Therefore, a Postman proxy works as a barrier that makes requests on behalf of the client and receives a response from the server. Subsequently, it masks your digital footprint and prevents unauthorized individuals from accessing your network.
Why Use Proxies with Postman
Here are some of the reasons why you need to use proxies with Postman:
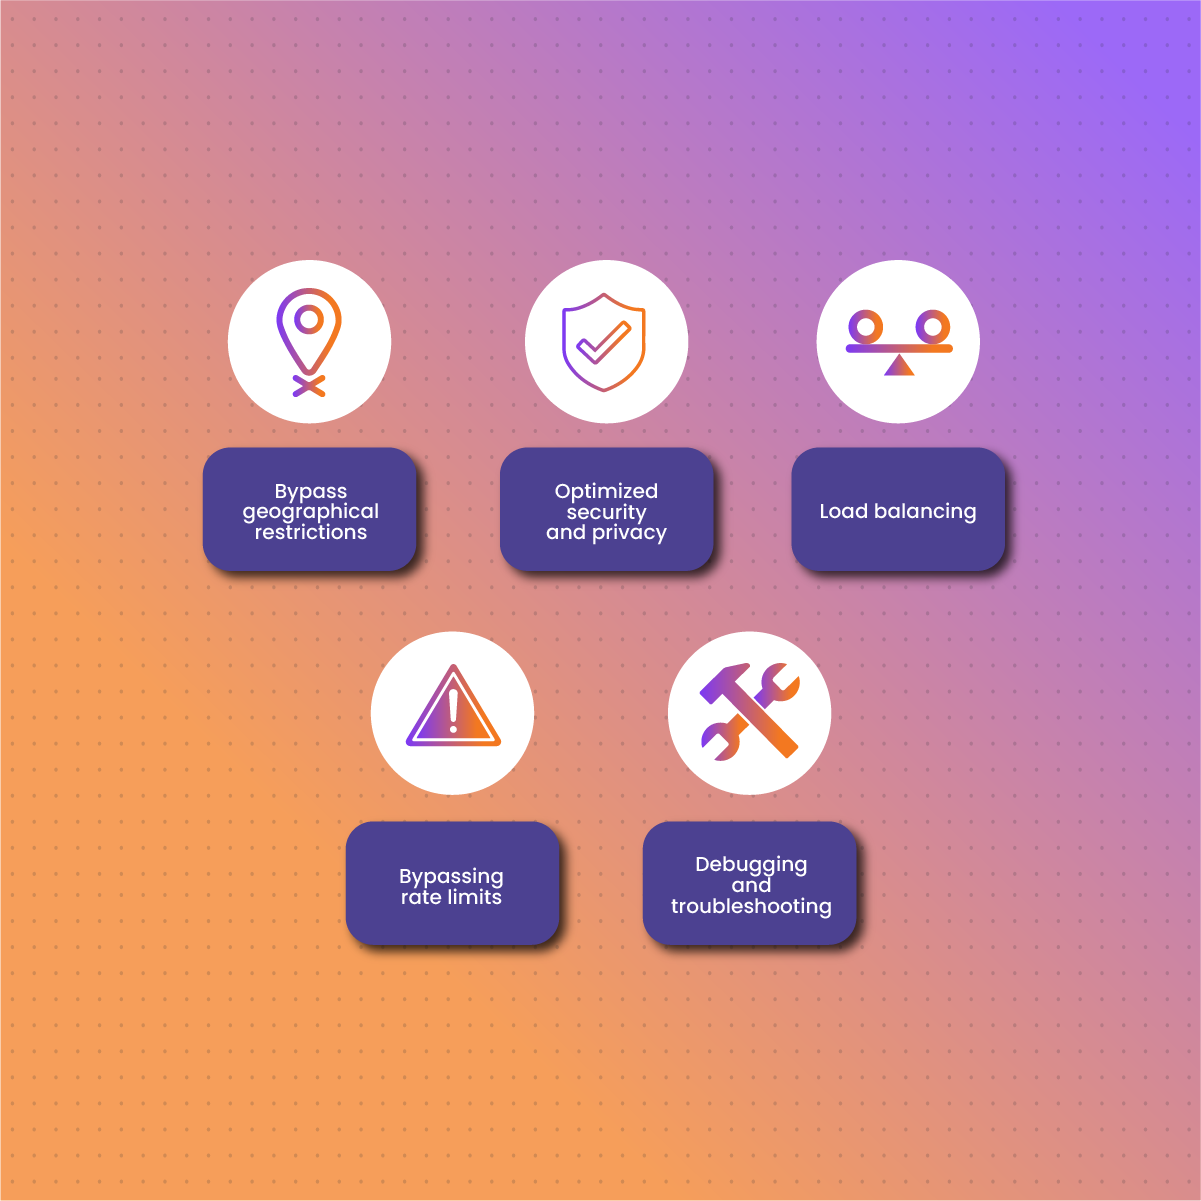
Bypass geographical restrictions
One application of integrating proxies in Postman is bypassing geographical restrictions. APIs may have content that is restricted to specific regions. Therefore, you can use proxies to change your location to ensure your application can handle requests from various locations. In addition, it allows developers to test how APIs respond to requests from different locations.
Optimized security and privacy
The primary function of proxies is to mask your actual IP address to maintain anonymity, privacy, and security. Therefore, using proxies provides an extra layer of anonymity when making a request via an API. In addition, proxies can be used to protect the integrity of data, especially when testing APIs that deal with sensitive data.
Load balancing
Proxies can be used to distribute requests across multiple IP addresses. This is crucial to avoid overloading the server, which can cause it to lag or crash. In addition, proxies play a crucial role in traffic distribution and management as a method of load balancing.
Bypassing rate limits
One of the limitations of working with an API is the restricted number of requests per IP address. Therefore, you can bypass this rate limit by routing requests through multiple proxies that can distribute the requests across different IP addresses.
Debugging and troubleshooting
Developers often use proxies to simulate various network conditions in an attempt to test how the API works. In addition, proxies can be used to intercept and log details of requests and responses that can be used for troubleshooting.
Proxy Configuration in Postman
Here is a detailed guide to configure a proxy in Postman:
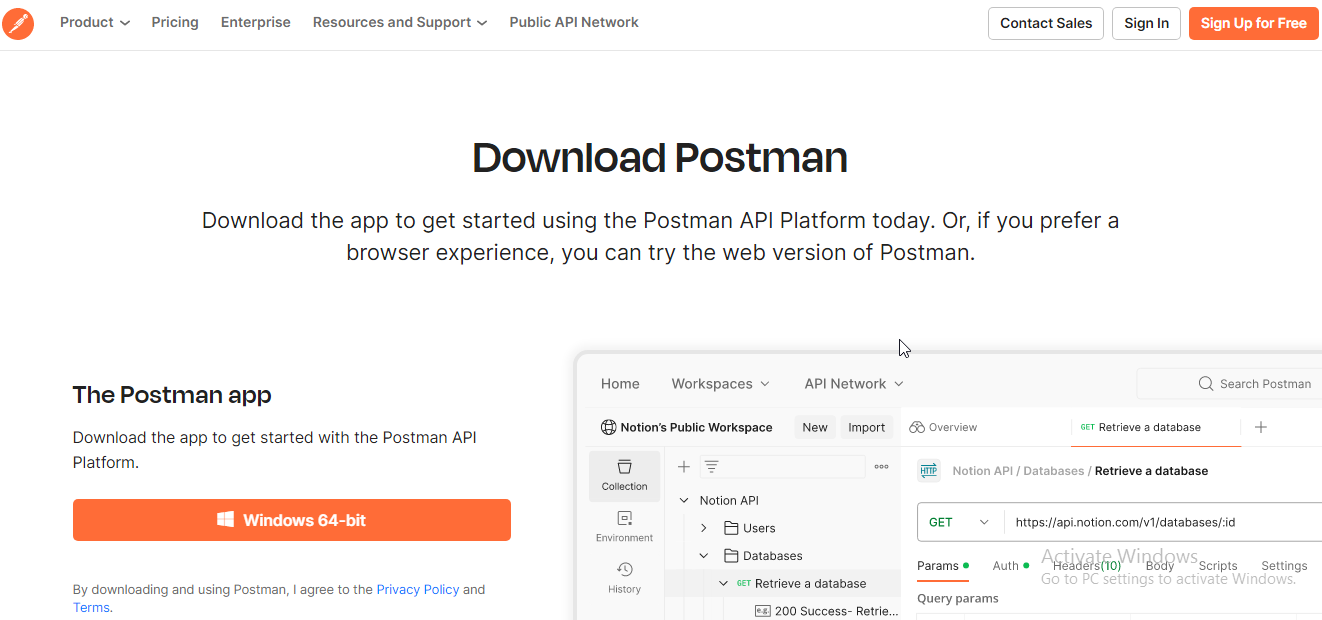
Step 1: Visit the official Postman website to download the app
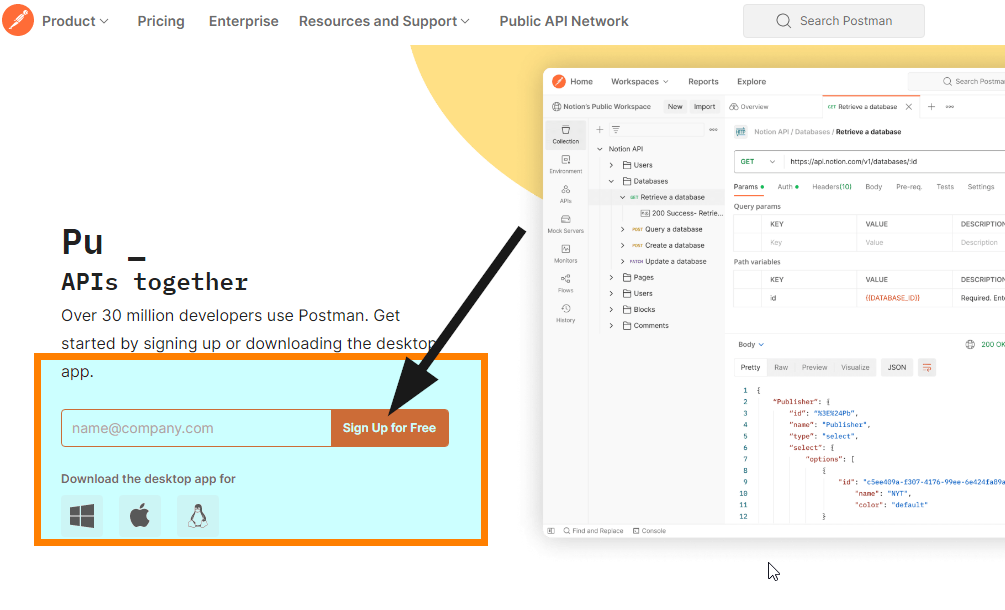
Step 2: Provide a valid email address to sign up for free
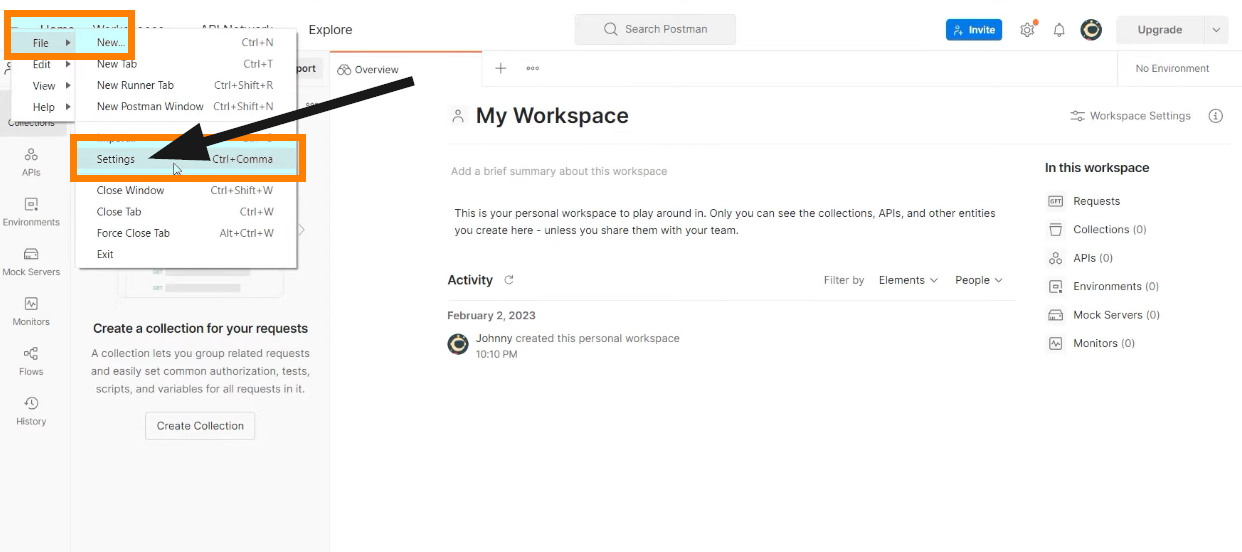
Step 3: Once the download is complete, launch the application and login. Then, click on the menu icon on the top left corner of the app. Click on File > Settings
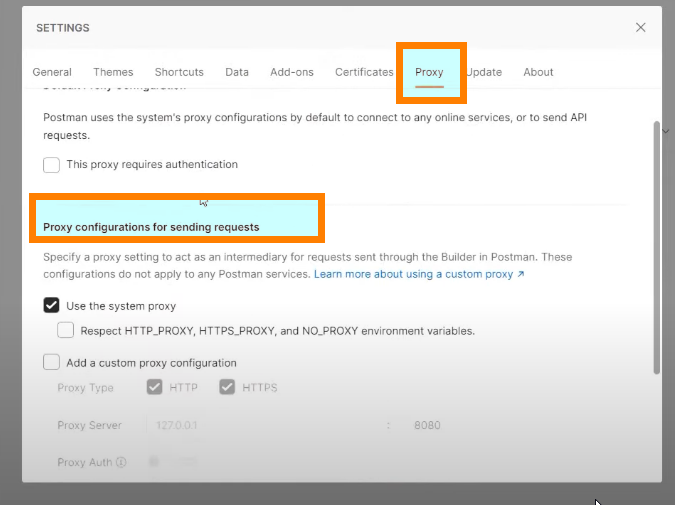
Step 4: From the Settings menu, select the Proxy tab and navigate the Proxy configuration for sending requests.
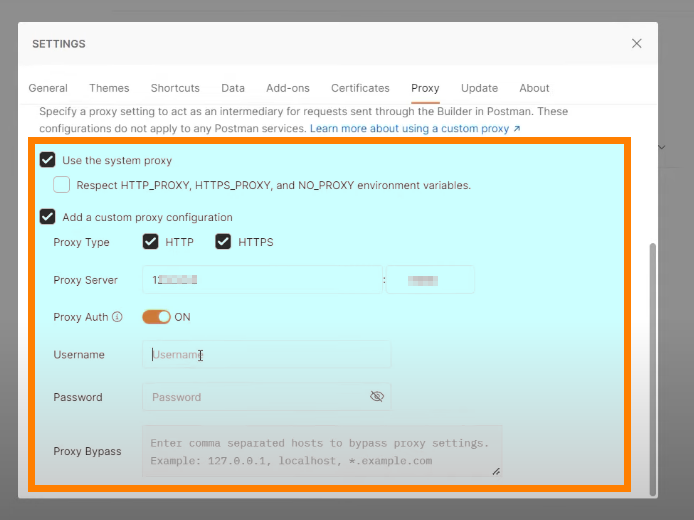
Step 5: Enable Add a custom proxy configuration. Then choose the Proxy type and enter the Proxy server and Port.
If you are using a premium proxy, then you need to enable Proxy Auth, which allows you to provide your proxy username and password.
Step 6: Your personal workspace has been created with a proxy so you can use it to build an API.
Understanding NetNut Proxy Configuration
There are various proxy types so when integrating NetNut proxies, choose HTTP or SOCKS5 protocol.
This is an example of a proxy string for a browser:
USERNAME-stc-uk-sid-123456789:PASSWORD@gw-am.netnut.net:5959
Step 1: Hostname Configuration
Copy the hostname/server address provided by NetNut
Example: Type gw-am.netnut.net into the host field if you are using HTTP protocol. Alternatively, type gw-socks-am.netnut.net for SOCKS5 protocol
Step 2: Port number Configuration
The Port number for NetNut HTTP proxies is 5959 and 9595 for SOCKS5
Step 3: Username Configuration
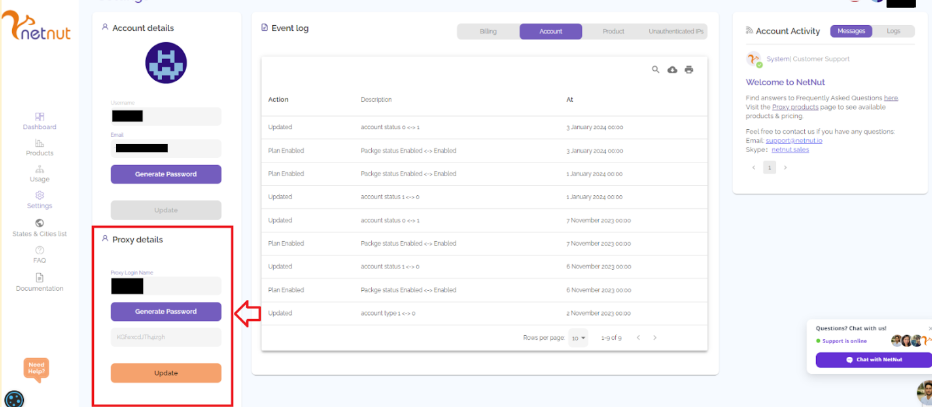
Username is your login, which you can find in your NetNut account in Settings -> Billing.
Proxy-type is the proxy type that you use. NetNut provides three different proxy types depending on your subscription plan. Your username should have three components including your user ID, type of proxy( residential, datacenter, static) and target country.
- dc — datacenter;
- res — rotating residential proxy;
- stc — static residential proxy.
Country is the country whose IP addresses will be used for connection. You can choose “Any,” in which case any available country will be used, or you can provide the ISO code of a specific country from the list of NetNut Available Countries: e.g., jp(Japan), fr(France).
Example: ticketing123-res-us
This is where you get the proxy username and password from the customer portal. You can also get in touch with your account manager if you’d like additional assistance.
Step 4: Consistent IP session
While NetNut provides rotating IP addresses, you may want a static IP address. This can be useful when you want to maintain your session via the same IPs. Then you need to incorporate a session id (SID) with your username.
How do you choose a SID?
- Choose a number between 4 to 8 digits
- Ensure the numbers are random and non-sequential to protect your IP address
For example: ticketing123-stc-us-SID-435765
Step 5: Proxy password
Insert the confidential NetNut proxy password
Choosing the Best Proxy Server Provider- NetNut
NetNut has an extensive network of residential IPs that offers unlimited concurrency for infinite scalability. Moreover, you can leverage the power of 1M+ mobile IPs, amplifying your web coverage exponentially.
NetNut provides you with different proxy solutions ranging from ISP proxies to static residential proxies, as well as US residential proxies. Static residential proxies allow you to maintain one IP address for a certain session. ISP proxies, on the other hand, come in handy to bypass CAPTCHA and geo-restrictions.
Furthermore, you can leverage our in-house solutions like Website Unblocker to bypass any restrictions and Scraper API for effective data collection from any part of the world.
Conclusion
With this detailed guide, you can successfully configure a proxy on Postman. Subsequently, you can use the Postman proxy to connect to any online service or send HTTP(s) requests. Postman is a platform that supports several aspects of API development, including design, testing, monitoring, and documentation.
In addition, it has powerful features and a user-friendly interface, which makes it a great tool for developers and their teams working with APIs. Therefore, leveraging Postman capabilities streamlines API development, which improves productivity.
Choosing a reliable proxy provider is a crucial step in configuring a Postman proxy. Kindly contact us if you need an expert to guide you in choosing the best proxy solution for your needs.
Frequently Asked Questions
Best practices for using a Postman proxy
Here are some factors to consider that can optimize your experience with a Postman proxy:
- Use secure proxies to ensure data is encrypted so that sensitive information can be protected.
- Choose reliable and reputable proxy providers to ensure optimal performance.
- Configure different proxies for different environments to maintain isolation and avoid cross-interaction.
- Monitor the performance of your Proxy to ensure they are not the source of lag in your network traffic.
What can I do if my network requires a proxy but I can’t send a proxy?
The solution is to enable the system proxy option in Postman and ensure the Proxy is set up for your operating system. Here are the settings for the different OS:
For Windows
- Open Settings
- Select Network & Internet and choose Proxy
- Toggle on the Manual proxy setup
- Enter the proxy address and port, and click Save
For Linux
- Open Settings > Network
- Toggle on the Network Proxy option
- Select Automatic or Manual and enter the configuration settings for your Proxy
For macOS
- Open System Preferences > Network
- Click on Advanced and select the Proxies tab
- Choose the Proxy type (HTTP(S) or SOCKS) and provide the username and password
- Click on OK to save the configurations
What are some common issues with configuring a proxy on Postman?
Although configuring a proxy on Postman is a straightforward process, you can experience some challenges. They include:
- 407 proxy authentication error: This error can occur as a result of a problem on the server or client side. This usually means that the proxy authentication details are incorrect.
- Out-of-date Postman version: Older versions of Postman may have certain issues related to proxy settings. Therefore, ensure you download the updated version for an optimized experience.
- SSL/TLS settings: Suppose your Proxy uses SSL/TLS protocols. Ensure the Postman settings are configured to handle these connections via the Proxy.
- Network connection: A weak network can cause issues when configuring a Postman proxy. Therefore, you need to ensure you have a strong internet connection to ensure the Postman can connect with the Proxy.
- Firewall settings: If your device has an active firewall, it can prevent the proxy from connecting with Postman.
- Proxy server availability: A less common issue can be related to proxy availability. Therefore, you need to contact your proxy provider to handle the issue before you attempt to connect the Postman proxy.

