Introduction to Screaming Frog
Screaming Frog is a platform for scraping SEO-related data. They provide a powerful and flexible SEO spider that can crawl small and big websites. It can scrape up to 500 URLs so you can gather real-time data to make informed SEO decisions. However, you can access more URLs if you update your Screaming Frog subscription.
The spider works by crawling website links, CSS, apps, and scripts to collect relevant data. Some of the applications of this data include SEO auditing, content analysis, XML sitemap generation, site structure analysis, performance insights, and broken link searches.
Like any other scraper, you can optimize its performance by integrating it with premium proxies. Therefore, this guide will examine how to integrate NetNut proxies with Screaming Frog.
Understanding NetNut Proxy Configuration
With over 85 million IPs, NetNut stands out as an industry-leading proxy provider with one of the highest proxy pools, which contains residential, data center, mobile, and unblocker proxies. Here are some reasons why you need to integrate NetNut proxies with Screaming Frog:
Security and anonymity
The need for online security and anonymity cannot be overemphasized with an increase in web scraping limitations. NetNut proxies come with smart features that ensure zero CAPTCHA and IP blocks. Subsequently, the Screaming Frog scraper can crawl websites without getting blocked.
Exceptionally fast data collection
NetNut guarantees 99.99% uptime which ensures you enjoy exceptionally fast data collection. Subsequently, you can use rotating residential proxies or data center proxies for higher success rate of requests which optimizes the reliability and quality of extracted data.
In addition, a residential proxy routes your network traffic through an IP address provided by an ISP. As a result, it appears like you are accessing the website from an actual physical address.
Unmatched global coverage
Since NetNut proxies cover over 195 countries, they provide an unmatched global coverage. Subsequently, you can collect data from various websites regardless of your location without worrying about geo-restrictions.
There are various proxy types so when integrating NetNut proxies, choose HTTP or SOCKS5 protocol.
This is an example of a proxy string for a browser:
USERNAME-stc-uk-sid-123456789:PASSWORD@gw-am.netnut.net:5959
Step 1: Hostname Configuration
Copy the hostname/server address provided by NetNut
Example: Type gw-am.netnut.net into the host field if you are using HTTP protocol. Alternatively, type gw-socks-am.netnut.net for SOCKS5 protocol
Step 2: Port number Configuration
The Port number for NetNut HTTP proxies is 5959 and 9595 for SOCKS5
Step 3: Username Configuration
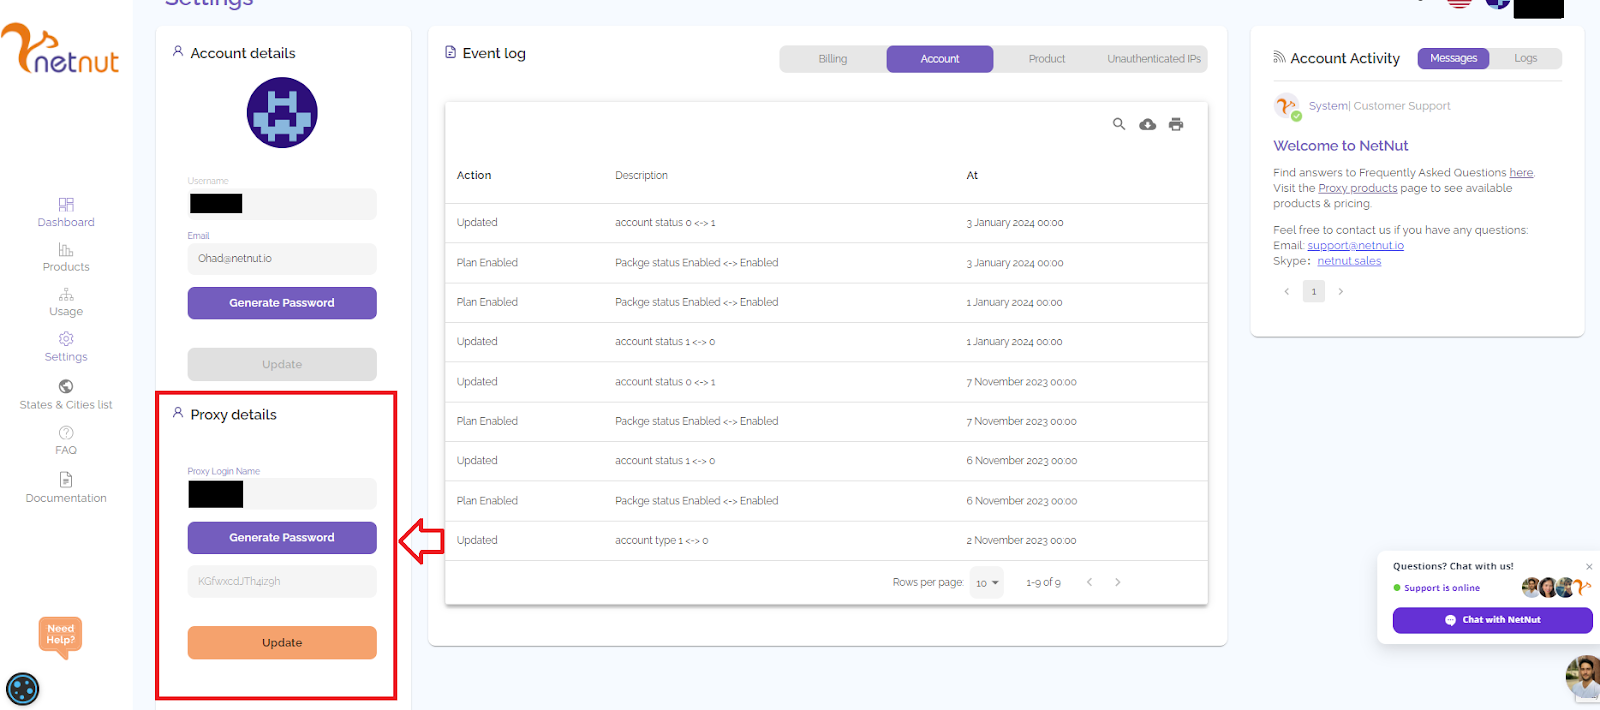
Username is your login, which you can find in your NetNut account in Settings -> Billing.
Proxy-type is the proxy type that you use. NetNut provides three different proxy types depending on your subscription plan. Your username should have three components including your user ID, type of proxy( residential, datacenter, static) and target country.
- dc — datacenter;
- res — rotating residential proxy;
- stc — static residential proxy.
Country is the country whose IP addresses will be used for connection. You can choose “Any,” in which case any available country will be used, or you can provide the ISO code of a specific country from the list of NetNut Available Countries: e.g., jp(Japan), fr(France).
Example: ticketing123-res-us
This is where you get the proxy username and password from the customer portal. You can also get in touch with your account manager if you’d like additional assistance.
Step 4: Consistent IP session
While NetNut provides rotating IP addresses, you may want a static IP address. This can be useful when you want to maintain your session via the same IPs. Then you need to incorporate a session id (SID) with your username.
How do you choose a SID?
- Choose a number between 4 to 8 digits
- Ensure the numbers are random and non-sequential to protect your IP address
For example: ticketing123-stc-us-SID-435765
Step 5: Proxy password
Insert the confidential NetNut proxy password
Integrating NetNut Proxy With Screaming Frog
In this section, we shall examine how to integrate NetNut proxies with Screaming Frog.
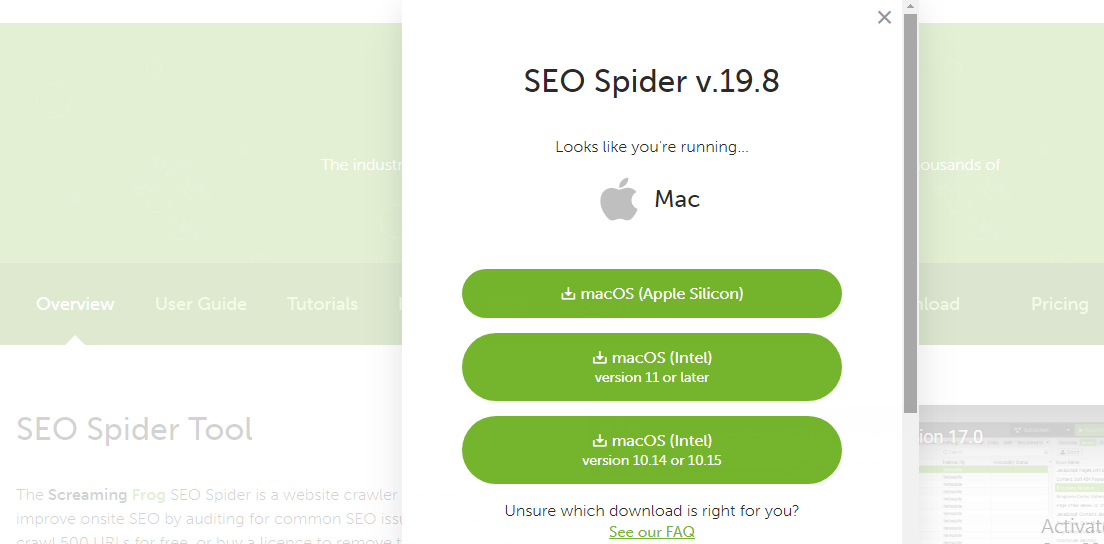
Step 1: Go to Screaming Frog official website and select Downloads. A pop-up window will appear where you can choose the version suitable for your operating system as shown below.
Step 2: There are various pricing options which can influence the functionalities that you can access. Subsequently, if you have the paid version, go to the menu bar above and select Licence and Enter Licence.

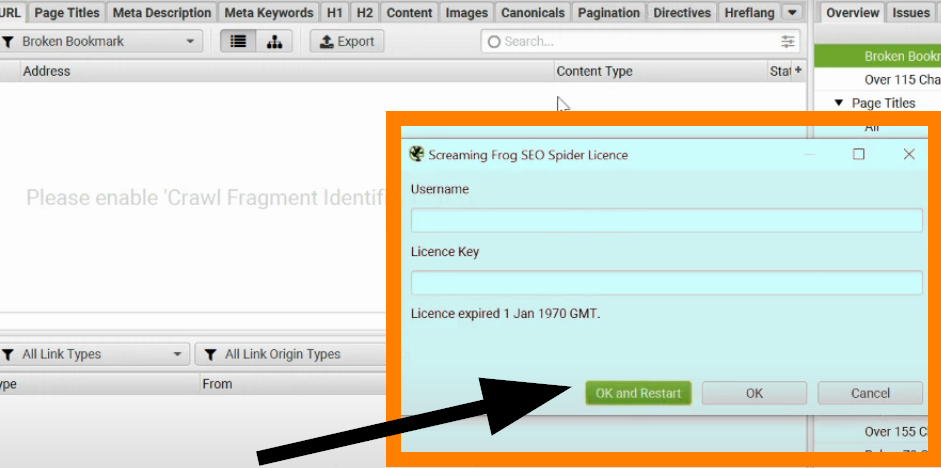
Step 3: A new window will pop up which requires you to enter the username and license key. You would have received these details in your email after registration. Click Ok and Restart
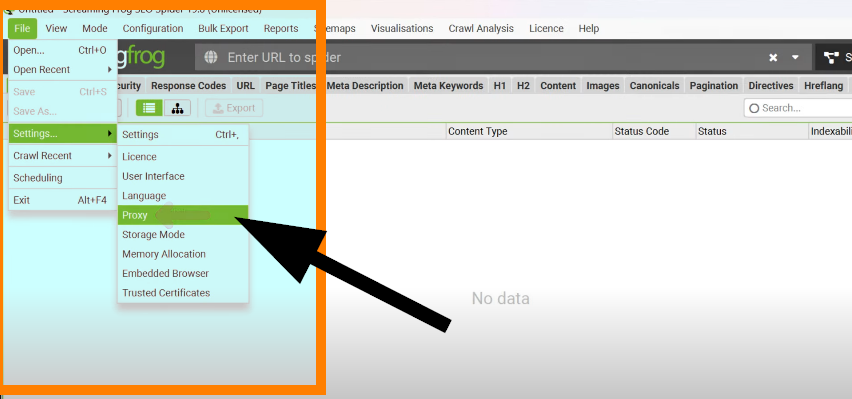
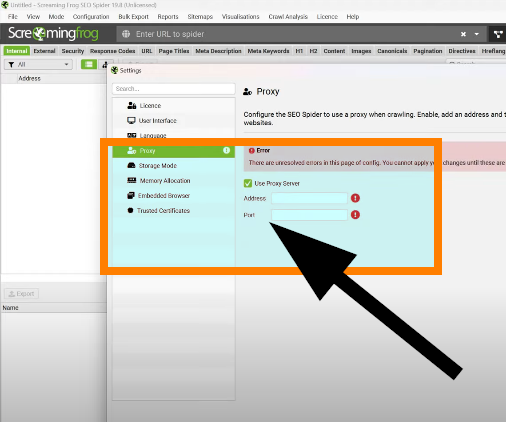
Step 4: Once that is done and you are on the home page, click on File > Settings > Proxy
Step 5: First, check the box beside Use Proxy Server; at this stage, you need to supply your NetNut Address and Port as discussed in the first section of this guide.
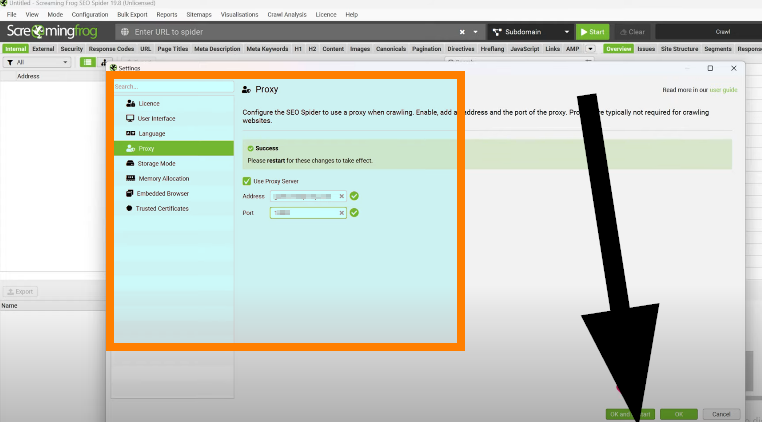
Step 6: You will receive a Success message if the configuration was successful. The next step is to restart to implement the changes.
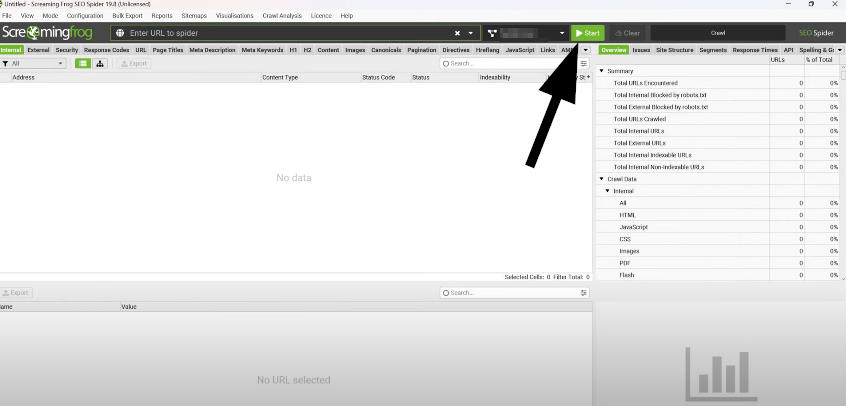
Step 7: The Screaming Frog scraper is ready for use. Enter URL to scrape in the space provided and click Start to begin data retrieval.
Conclusion
Following the steps in this guide reveals that integrating NetNut proxies with Screaming Frog is a simple process. Screaming Frog is used for auditing a website’s SEO by analyzing links, images and other elements on the page.
Integrating NetNut proxies with Screaming Frog optimizes data collection especially for larger websites. Subsequently, this allows you to improve SEO strategy to make data-driven decisions that optimizes your business strategy.
Kindly contact us if you need to speak to an expert regarding the best solution for your needs. Do you want to learn how to integrate NetNut proxies with other tools? Be sure to check out other NetNut integrations.