What is Guzzle?
Guzzle is a PHP HTTP client which simplifies sending HTTP requests. This simple interface allows for building query strings, uploading JSON data, streaming large uploads, large downloads and more. In addition, it can be used to send asynchronous and synchronous requests via the same interface. Other features include:
- It supports PSR-18 which allows interoperability between other PSR-18 HTTP Clients ( PSR-18 clients are useful in sending HTTP requests and returning HTTP responses)
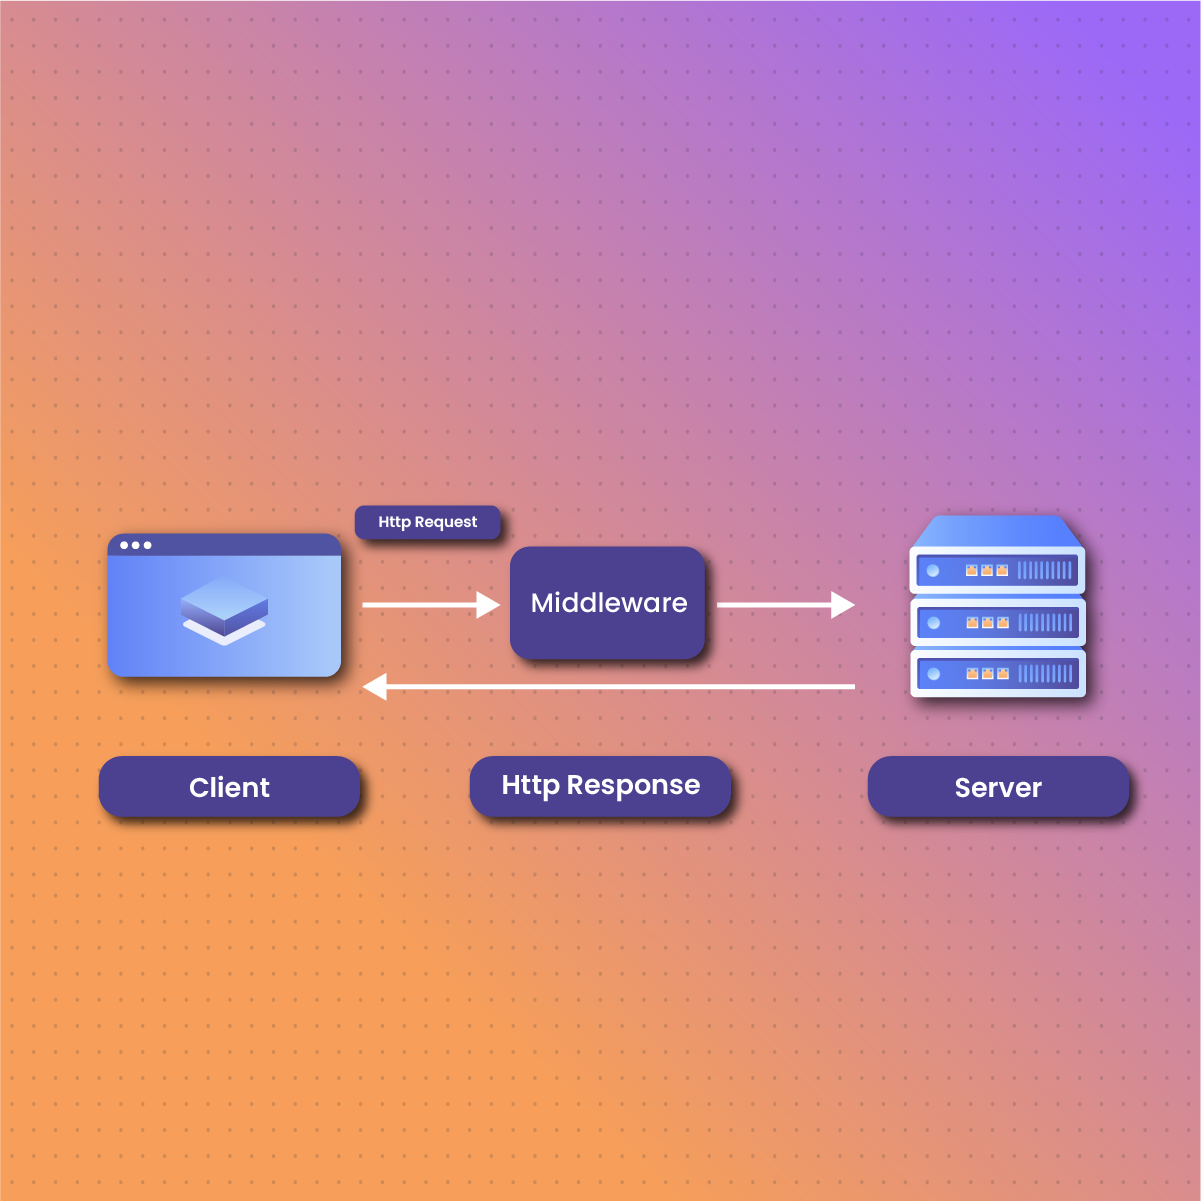
- The middleware system allows you to augment and compose client behavior
- It abstracts away the underlying HTTP transport, allowing you to write environment and transport agnostic code. Subsequently, there is no hard dependency on sockets, cURL, PHP streams or non-blocking event loops.
- Guzzle uses PSR-7 interfaces for requests, streams, and responses. Subsequently, this allows you to use other PSR-7 compatible libraries with Guzzle (PSR-7 is a group of interfaces defined by PHP Framework Interop Group. They represent HTTP messages and URI-uniform resource identifier used when communicating via HTTP)
PSR allows developers to create libraries decoupled from HTTP client implementation. Subsequently, this reduces the chances of version conflict and number of dependencies which makes the libraries more reusable.
Configuring Guzzle
Step 1: Install composer
The first step is to install Guzzle using composer. However, if you don’t have it installed, you can follow these steps to install composer:
- Download the composer installer via the following command:
php -r “copy(‘https://getcomposer.org/installer’, ‘composer-setup.php’);”
- Run the installer with the command below:
php composer-setup.php
- The next step is to make Composer globally accessible from any directory in your terminal. You can do this by moving its binary to the globally accessible path for binaries:
sudo mv composer.phar /usr/local/bin/composer
- If you are using Windows, go to Advanced System Settings and choose Environment Variables. Alternatively, you can add a new path entry to the composer.phar in the PATH Environment variable to get the same outcome.
Step 2: Install Guzzle
After installing the composer, you can use it to install Guzzle for this PHP project. You can run it with this command:
php composer require guzzlehttp/guzzle
Once the command is executed, guzzle and its dependencies will start installing to the current working directory.
Step 3: Create a new PHP file and import the installed library
require_once ‘vendor/autoload.php’;
use GuzzleHttp\Client;
Step 4: Make a GET request by creating a client object as shown below
$client = new Client();
$client->request(‘GET’, ‘https://www.netnut.io’, [‘proxy’ => ‘https://username:password@<proxy_address>:<port>’]);
From the above code, we are initializing a Client object and using it to send a GET request to https://www.netnut.io website. Subsequently, we are parsing proxy as an extra argument.
In addition, for the proxy URL above, we are passing the username, password, IP address and port.
Step 5: Adding proxies
While there are various types of proxies, one of the best practices is to use rotating proxies with Guzzle. There are various ways to rotate an IP address. First, you can create an array of IPs and manually rotate them via PHP programming. However, this can be effort-intensive and there is a possibility that you may forget to rotate the IP as frequently as necessary which could trigger an IP block.
Another method is to leverage NetNut proxy solutions that offer automatic IP rotation. In addition, the dashboard provides a convenient platform to manage your proxies and configure settings to ensure optimal performance. Subsequently, the next section will examine the details of NetNut proxies.
Understanding NetNut Proxy Configuration
There are various proxy types so when integrating NetNut proxies, choose HTTP or SOCKS5 protocol.
This is an example of a proxy string for a browser:
USERNAME-stc-uk-sid-123456789:PASSWORD@gw-am.netnut.net:5959
Step 1: Hostname Configuration
Copy the hostname/server address provided by NetNut
Example: Type gw-am.netnut.net into the host field if you are using HTTP protocol. Alternatively, type gw-socks-am.netnut.net for SOCKS5 protocol
Step 2: Port number Configuration
The Port number for NetNut HTTP proxies is 5959 and 9595 for SOCKS5
Step 3: Username Configuration
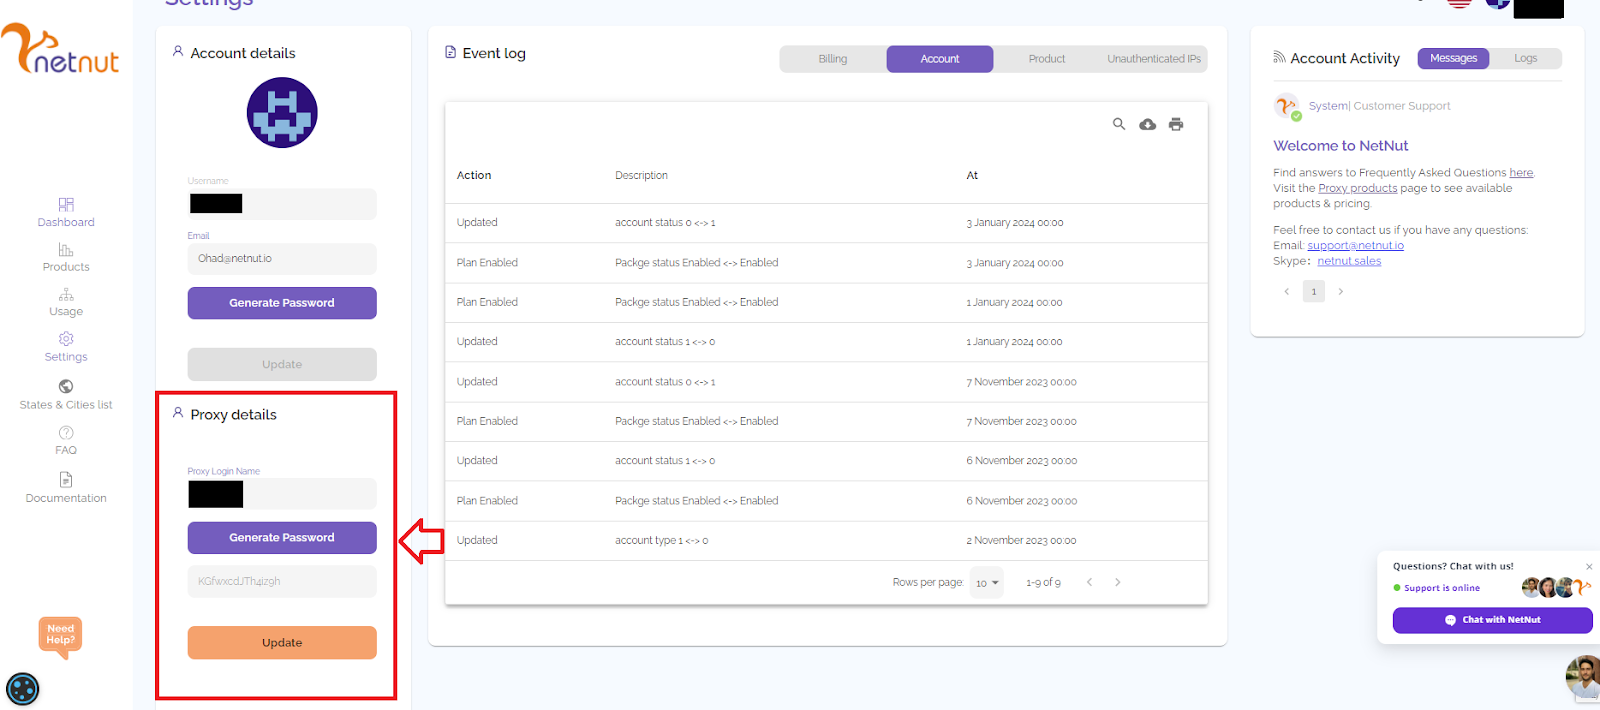
Username is your login, which you can find in your NetNut account in Settings -> Billing.
Proxy-type is the proxy type that you use. NetNut provides three different proxy types depending on your subscription plan. Your username should have three components including your user ID, type of proxy( residential, datacenter, static) and target country.
- dc — datacenter;
- res — rotating residential proxy;
- stc — static residential proxy.
Country is the country whose IP addresses will be used for connection. You can choose “Any,” in which case any available country will be used, or you can provide the ISO code of a specific country from the list of NetNut Available Countries: e.g., jp(Japan), fr(France).
Example: ticketing123-res-us
This is where you get the proxy username and password from the customer portal. You can also get in touch with your account manager if you’d like additional assistance.
Step 4: Consistent IP session
While NetNut provides rotating IP addresses, you may want a static IP address. This can be useful when you want to maintain your session via the same IPs. Then you need to incorporate a session id (SID) with your username.
How do you choose a SID?
- Choose a number between 4 to 8 digits
- Ensure the numbers are random and non-sequential to protect your IP address
For example: ticketing123-stc-us-SID-435765
Step 5: Proxy password
Insert the confidential NetNut proxy password
Method B: Using Middleware
An alternative to setting proxies in Guzzle is to use middleware. Subsequently, it follows a similar method to the initial method. The primary difference is in how you create and integrate the proxy server into the default handler stack.
First, adjust your imports like this:
# …
use Psr\Http\Message\RequestInterface;
use GuzzleHttp\HandlerStack;
# …
Next, you need to establish a proxy middleware by writing the following codes immediately after the $proxies array. Subsequently, the middleware intercepts every request and configures the proxies as necessary.
function proxy_middleware(array $proxies)
{
return function (callable $handler) use ($proxies) {
return function (RequestInterface $request, array $options) use ($handler, $proxies) {
# add proxy to request option
$options[RequestOptions::PROXY] = $proxies;
return $handler($request, $options);
};
};
}
The next step is to integrate the middleware into the default handler stack and refresh our Guzzle client by incorporating the stack like this:
$stack = HandlerStack::create();
$stack->push(proxy_middleware($proxies));
$client = new Client([
‘handler’ => $stack,
RequestOptions::VERIFY => false, # disable SSL certificate validation
RequestOptions::TIMEOUT => 30, # timeout of 30 seconds
]);
Subsequently, the PHP script will look like this:
<?php
require ‘vendor/autoload.php’;
use GuzzleHttp\Client;
use GuzzleHttp\RequestOptions;
use Psr\Http\Message\RequestInterface;
use GuzzleHttp\HandlerStack;
# make request to
$targetUrl = ‘https://lumtest.com/myip.json’;
# proxies
$proxies = [
‘http’ => ‘https://USERNAME:PASSWORD@’netnut.io’:0000′,
‘https’ => ‘https://USERNAME:PASSWORD@’netnut.io’:0000′,
];
function proxy_middleware(array $proxies)
{
return function (callable $handler) use ($proxies) {
return function (RequestInterface $request, array $options) use ($handler, $proxies) {
# add proxy to request option
$options[RequestOptions::PROXY] = $proxies;
return $handler($request, $options);
};
};
}
$stack = HandlerStack::create();
$stack->push(proxy_middleware($proxies));
$client = new Client([
‘handler’ => $stack,
RequestOptions::VERIFY => false, # disable SSL certificate validation
RequestOptions::TIMEOUT => 30, # timeout of 30 seconds
]);
try {
$body = $client->get($targetUrl)->getBody();
echo $body->getContents();
} catch (\Exception $e) {
echo $e->getMessage();
}
?>
Finally, let us add the function to rotate the IP address:
function rotating_proxy_request(string $http_method, string $targetUrl, int $max_attempts = 3): string
{
$response = null;
$attempts = 1;
while ($attempts <= $max_attempts) {
$proxies = get_random_proxies();
echo “Using proxy: “.json_encode($proxies).PHP_EOL;
$client = new Client([
RequestOptions::PROXY => $proxies,
RequestOptions::VERIFY => false, # disable SSL certificate validation
RequestOptions::TIMEOUT => 30, # timeout of 30 seconds
]);
try {
$body = $client->request(strtoupper($http_method), $targetUrl)->getBody();
$response = $body->getContents();
break;
} catch (\Exception $e) {
echo $e->getMessage().PHP_EOL;
echo “Attempt “.$attempts.” failed!”.PHP_EOL;
if ($attempts < $max_attempts) {
echo “Retrying with a new proxy”.PHP_EOL;
}
$attempts += 1;
}
}
return $response;
}
$response = rotating_proxy_request(‘get’, ‘https://lumtest.com/myip.json’);
echo $response;
Conclusion
This integration has examined two methods for setting up proxies in Guzzle. Both methods are simple, straightforward, and allow you to send HTTP requests with ease. However, you must bear in mind that all free proxies are unreliable. Therefore, it becomes crucial to invest in premium options like NetNut proxy servers for optimized security and anonymity. In addition, NetNut proxies come with built-in smart features like a reliable rotating IP system as well as other advanced anti-bot bypass measures to guarantee the success of your scraper. Kindly contact us if you need to speak to an expert regarding the best solution for your needs. Do you want to learn how to integrate NetNut proxies with other tools? Be sure to check out other NetNut integrations.


