Introduction of Dicloak
DICloak is a modern and reliable antidetect browser designed to help users navigate the complexities of the online world securely. Unlike conventional browsers, DICloak was created for multi-account working without problems of account creation and it allows the management of several accounts without limitations and bans. Whether you’re a digital marketer, a social media manager, or an online entrepreneur, DICloak assures your online activities remain confidential and secure on the web.
NetNut Proxy Configuration
-
Log in to NetNut and copy proxy information

- Log in to your NetNut Dashboard.
- NetNut Proxy details:
- Proxy Type: HTTP
- Proxy Host: gw.netnut.net
- Proxy Port: 5959
- Proxy Username: proxy login name-stc-any-sid-number sequence
- Proxy Password: Password generated on the NetNut “My Profile” page
Note:
- Proxy Username: The proxy login name can be found in the “My Profile” section on NetNut. If no specific country is needed, keep “stc-any”. If you need to specify a country, replace “any” with the country code, e.g., “us”. You can find country codes here: https://l.netnut.io/countries.
- “sid-number sequence” can be any random number between 1 and 99,999,999, with a maximum of 8 digits. It cannot be in a sequential order like 123456.
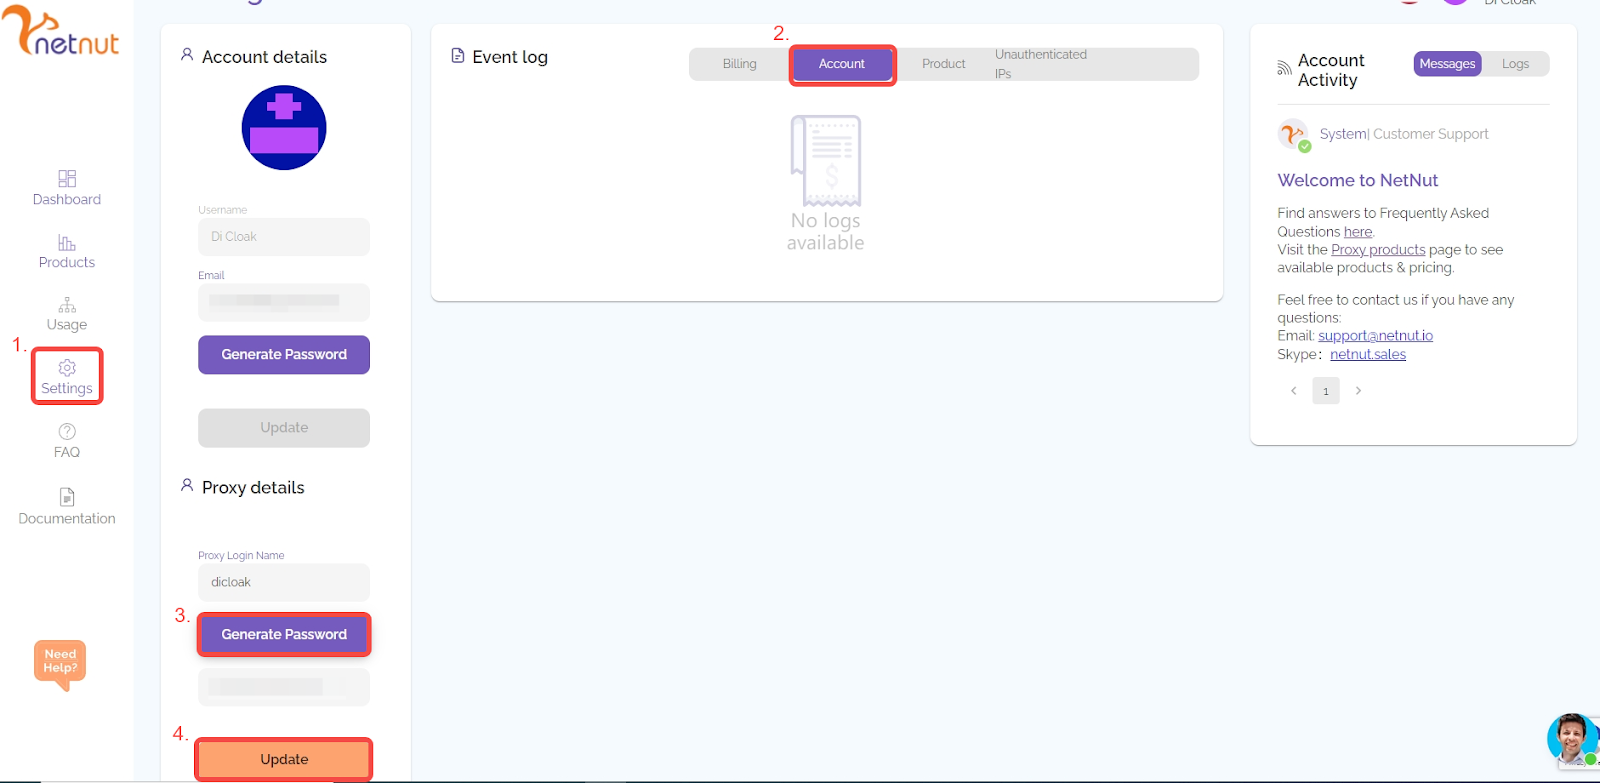
- Proxy Password Location: NetNut – Setting – Generate Password. Note that the generated password will only take effect 15 minutes later. Please take a screenshot of the password and click “Update” to confirm.
2. Configure NetNut Proxy in DICloak
Note: Internet connections within mainland China (excluding Hong Kong, Macau and Taiwan) generally cannot directly access foreign IPs. Therefore, if you are trying to configure an overseas IP proxy in DICloak within mainland China (excluding Hong Kong, Macau and Taiwan), you need to set up an overseas network through a VPS, a dedicated international line, or a VPN service first. Then you will be able to connect and access the overseas IP in DICloak properly.
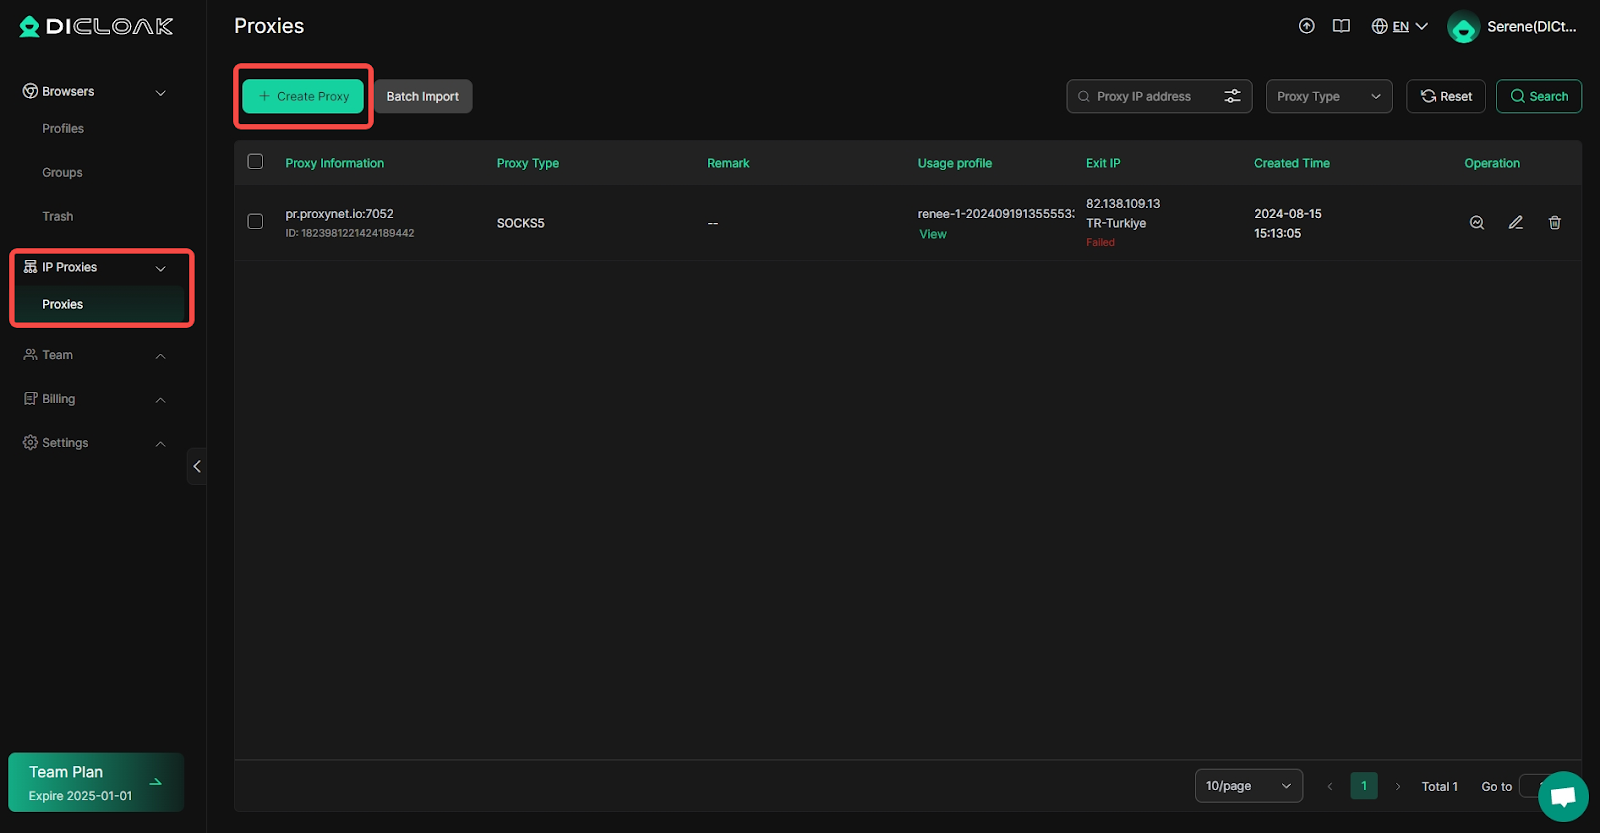
- Log in to DICloak, find the “Proxies” on the left navigation bar, and click “Create Proxy“.
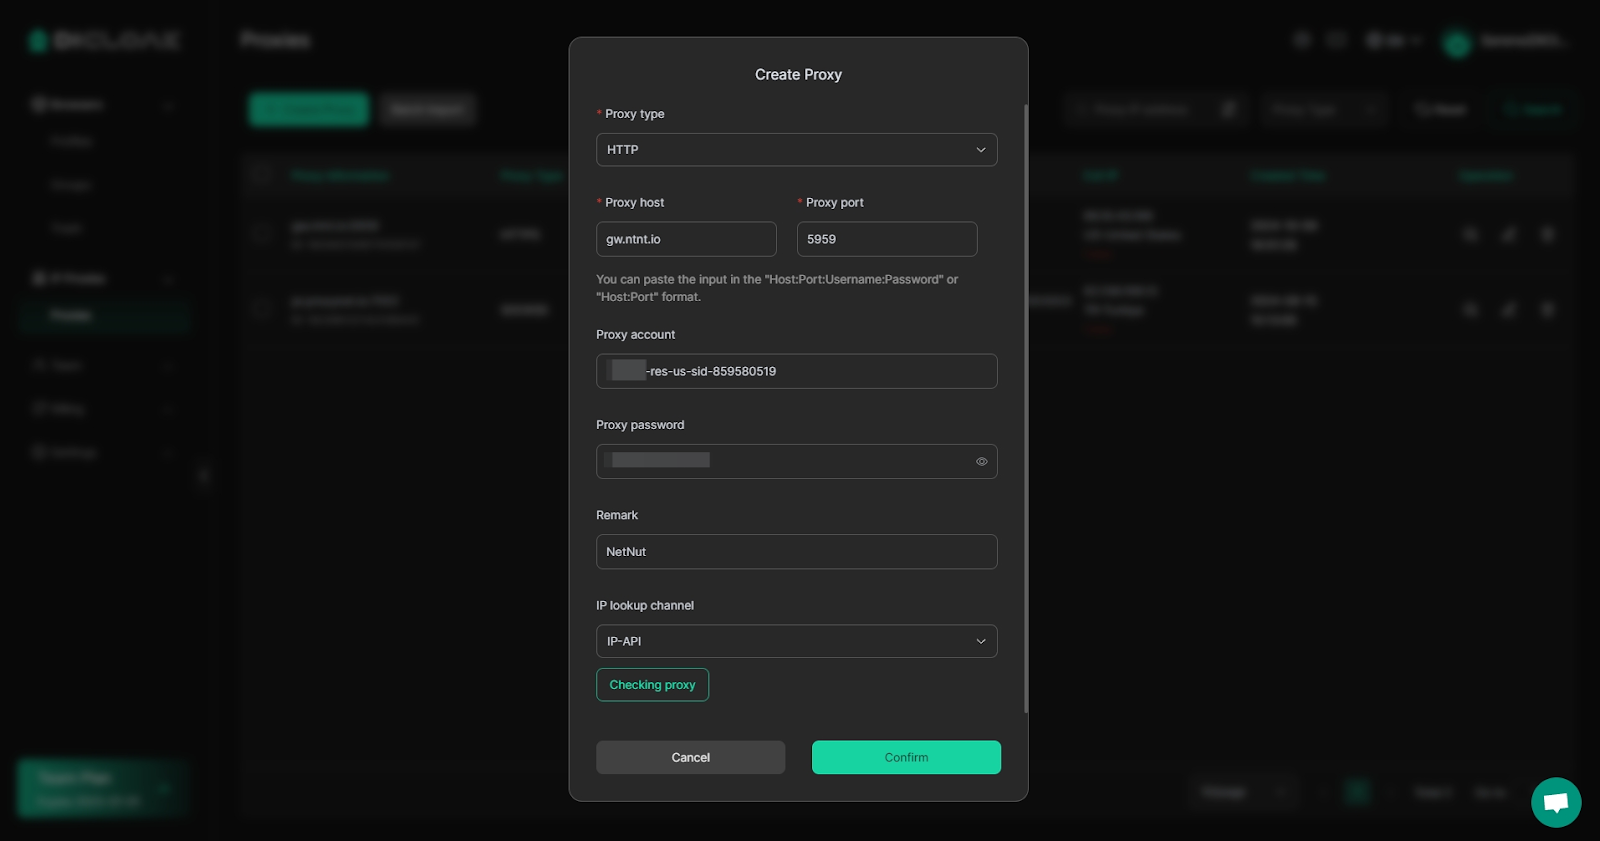
- Based on your proxy information purchased on NetNut, you need to select the “Proxy Type” and copy the “Proxy Host“, “Proxy Port“, “Proxy Account“, and “Proxy Password” from the NetNut website, then paste them into DICloak.

- Click “Checking Proxy” to verify if the proxy is successfully connected. If the connection is successful, click the “Confirm” button to complete the proxy setup.
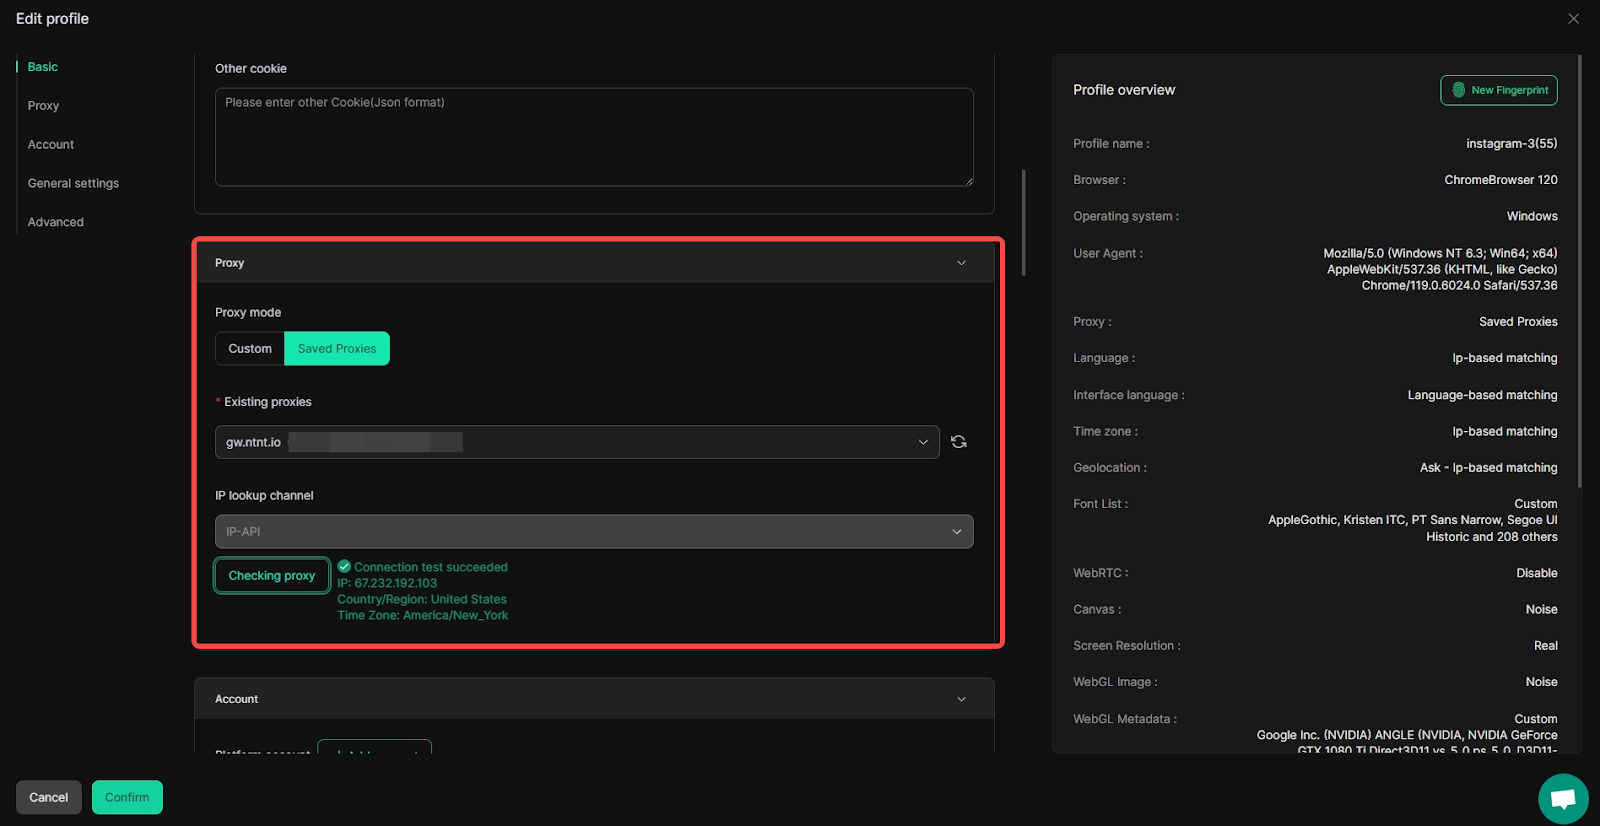
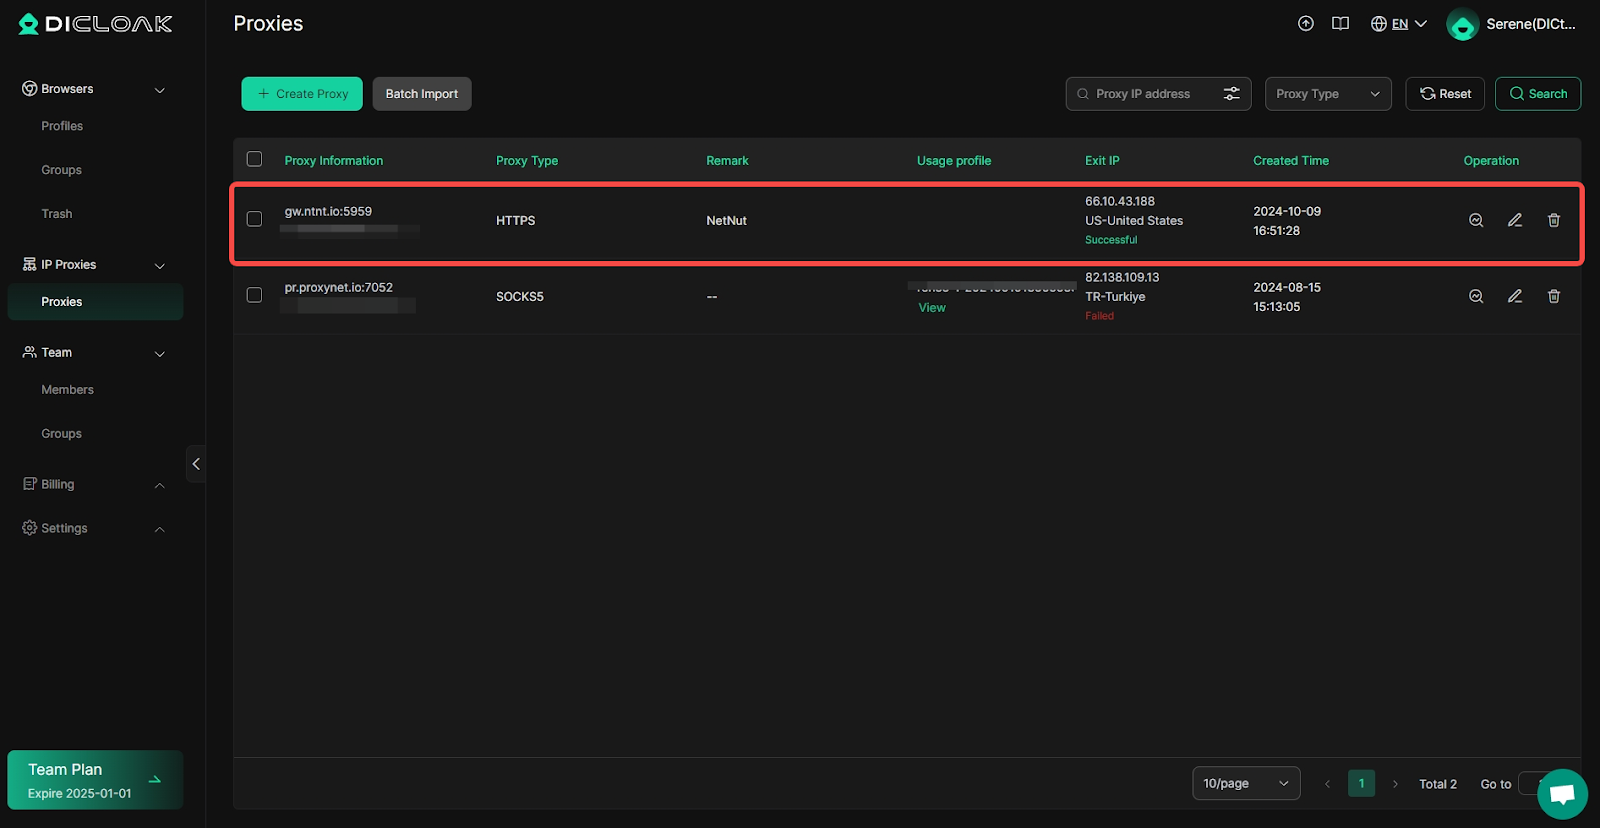
- Once the proxy is set up, you can use it when creating browser profiles by selecting “Saved Proxies” and choosing the proxy you have configured.